 15-03-2023
WordPress security - xmlrpc file shielding
WordPress is the most popular content management system for creating a website. And for good reason, because a website can be created quickly and can be edited completely visually. For almost every setting and configuration, there is a menu, theme or plug-in you can choose from to achieve your goal. However, being the most popular content management system, it is also more vulnerable in some areas than a content management system like Umbraco. However, with some precautions, a WordPress website can be made as secure as possible. In this blog post, you will learn how to completely eliminate a WordPress vulnerability. Blocking access to the xmlrpc.php file.
What is the XMLRPC.php file?
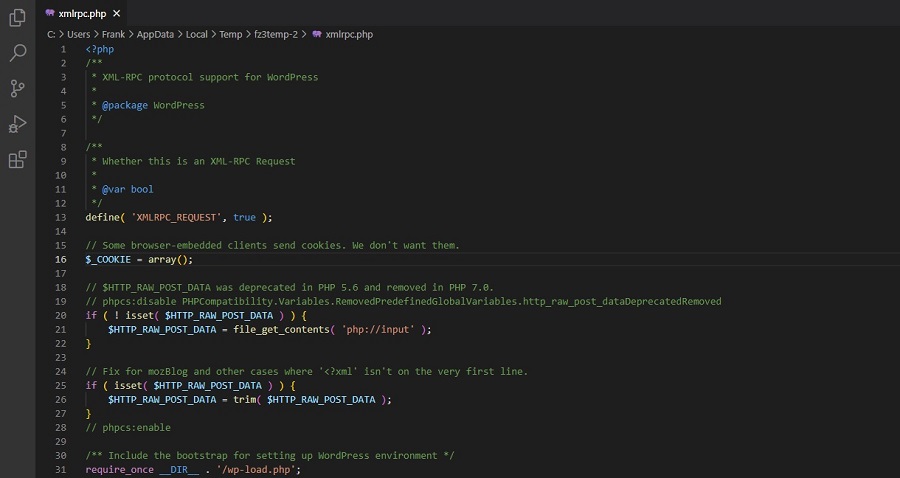
The XMLRPC.php file is a file that allows and controls access to the WordPress management environment from external sources. This was mainly the case in the past and has been active by default since WordPress version 3.5. However, today it is rarely used and does not need to be enabled. This is because malicious people can abuse this file to gain access to your website more easily. So, it is more than advisable to make sure that this file cannot be used for this purpose.
Blocking access only hinders when using local apps.
Blocking access to this file has a disadvantage only if you want to manage access to your WordPress website externally. In this case, the most common scenario is the WordPress local app that you can install on your phone. However, it's easier to log into your website using the internet browser on your phone if you want to make a small change. And you won't be using your phone for much more than that when working on your website.
Changing an opening time or date on your site, clearing the cache, or locking that comment is just as easy to do through the browser as it is through the local WordPress app. When you start working on your WordPress website, it's better to reach for your laptop or desktop with a physical keyboard and mouse.
Blocking access with the web.config file
To block access to the xmlrpc.php file, you can use several methods. However, the best and cleanest way is to block access directly using the web.config file. By default, you can find this file in the wwwroot of the WordPress installation on the hosting. It is the most suitable for this purpose, because the request will then be blocked directly and will not be routed through your website first. This is faster and more secure than other solutions.
You can edit the web.config file using any text editor like Notepad or Notepad++. This can be done via an FTP connection or via the file manager in the control panel. Always make a backup copy of the contents of the web.config file before you begin. If you make a mistake, you can fix it quickly.
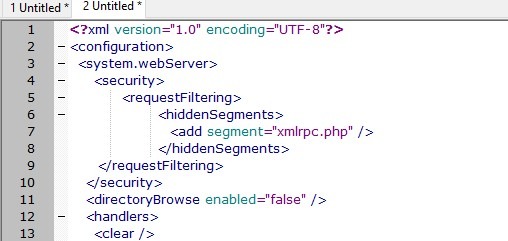
You can then make changes to the web.config file:
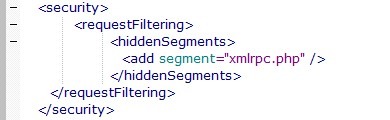
You can add this element, Security, inside the System web server tag. And you must add it correctly, because if you make mistakes here, your site will go offline with a 500 error. So don't add the element between an existing element, like the rewrite. Preferably, add it right after the system web server tag, as in the example below:
If you can't get this to work or still get an error message, restore your web.config file using the backup you created. And then create a ticket with your changes in it. Then we will check it for you.
To test if it works, go to your website and put the filename after the URL of your homepage. In our example:
Mijndemopartner.nl/xmlrpc.php.
This will then immediately result in a 404 message if everything went right.
Other ways to defuse the file
There are several ways to make the file inaccessible. The most obvious is probably to delete the file. However, this is more of a stopgap than a solution, as the file is restored with every WordPress update. So in this case, it is more advisable to use the web.config method as it only needs to be changed once. As long as you keep the web.config.
You can also install a plug-in for it, but that is just another plug-in that has only one function. And will therefore further pollute your plugin list. So, even with the available plug-ins, we recommend you do this manually.
Are you still looking for more tips to protect your WordPress website? Then also take a look at our previous blog posts and our knowledge base. In them we have already covered many tips and tricks.