
Categories
Install PIWIK
How do I install Piwik on my web hosting?
This article explains how to install the statistics tool PIWIK, this is a comprehensive statistics tool that stores the data of visitors on your website.
You have a number of things needed to install this tool below you see this in a row:
- MySQL database and User created in the control panel.
- Filemanager or FileZilla, filezilla of course requires an FTP account.
- Basic knowledge of the folder structure and how to move files.
- Piwik installation file can be downloaded here: https://piwik.org/download/
You upload the Piwik file to the wwwroot and unpack it in a logical location, such as domain name.nl/analytics. However, this can also be uploaded directly into the wwwroot or on a subdomain. The choice is yours.
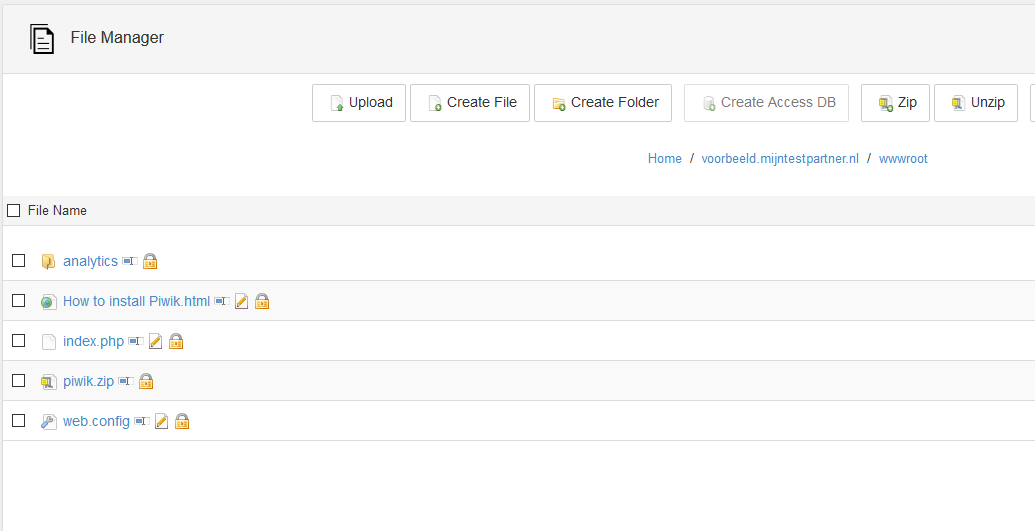
After this your wwwroot looks like this for example:
When you have the files in order you can go to the URL, in this example PIWIK is installed in an analytics folder.
https://voorbeeld.mijntestpartner.nl/analytics/
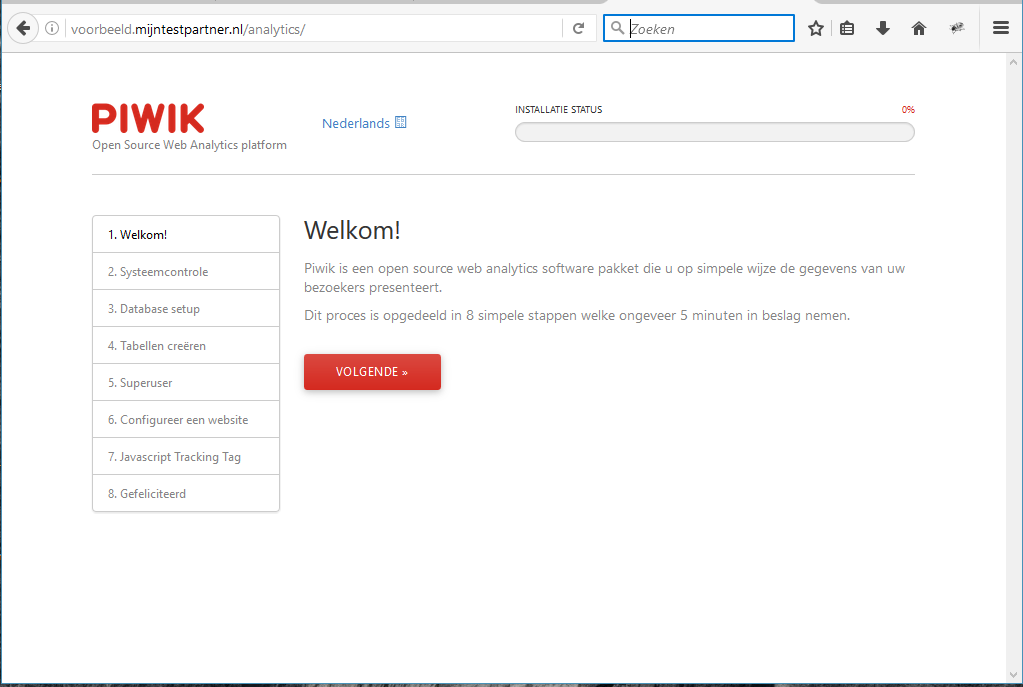
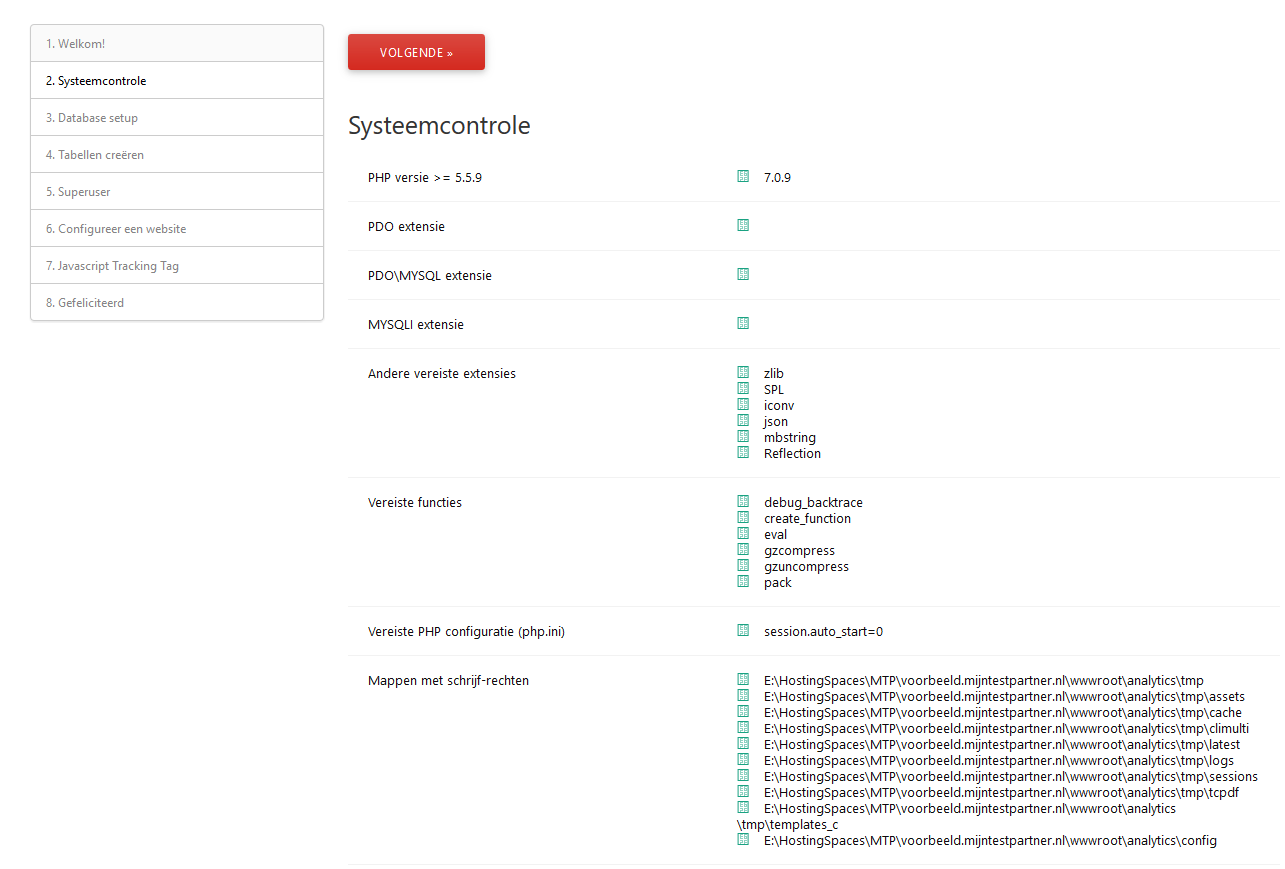
You then come to the installation screen. Here you push through to the next step. Piwik will check your hosting space for specifications. We have set the space to the latest available PHP version. PHP 7
. It is a requirement that you configure the latest PHP version that is available. This can be done in the following way .
You also need to create write permissions on the following folders and files:
- tmp
- config
- File piwik.js in the wwwroot of the installation.
If you have errors or problems with this then Piwik also gives the solutions.
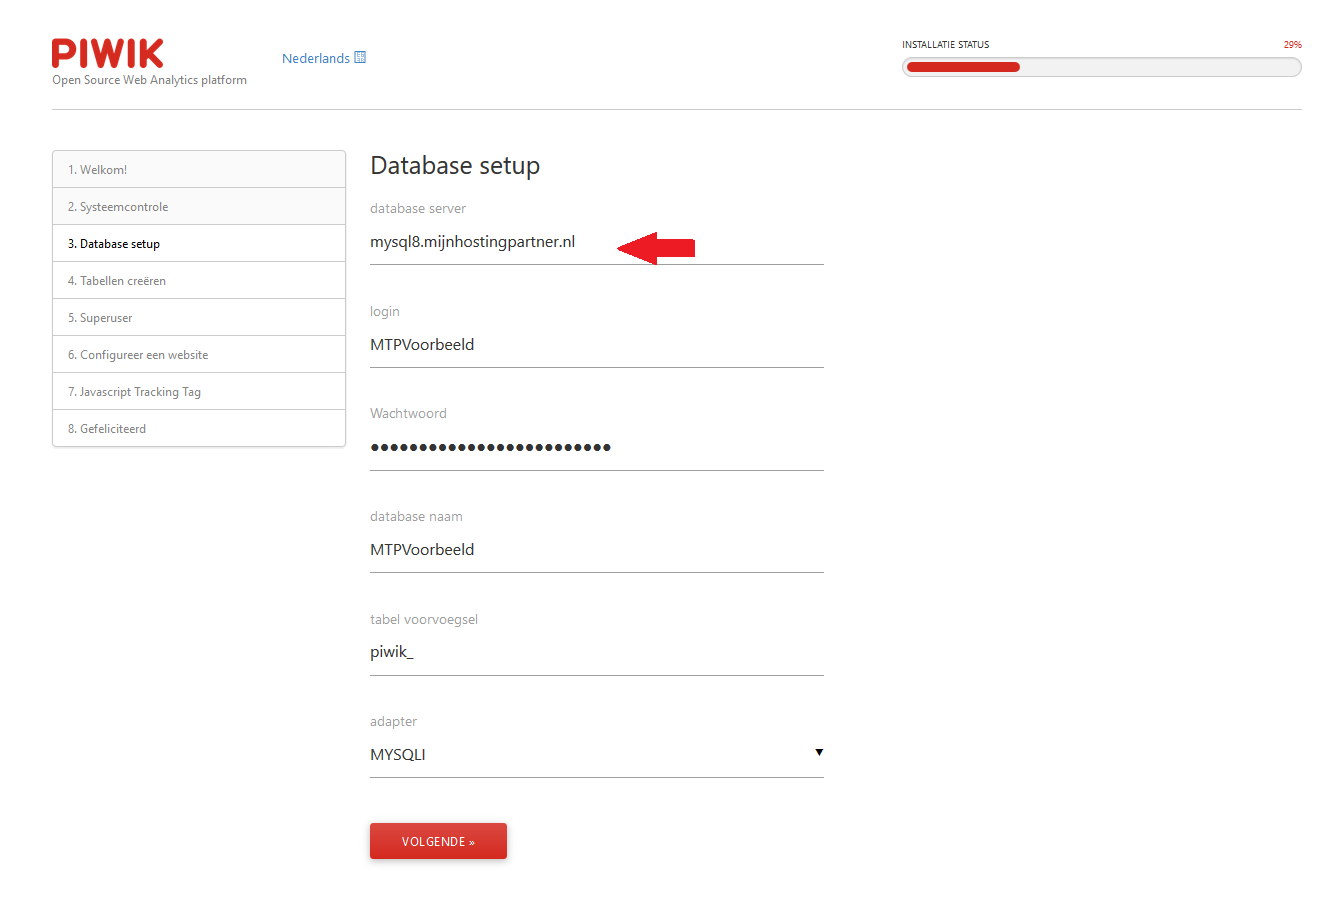
In the next screen you will see the database data that needs to be filled in, you need to specify the host at the red arrow. This is at the webhosting of MijnHostingPartner.nl always unique to your hosting space. In this test environment the database is on mysql 8. This can be checked in the following way.
Remember that this data is case sensitive. The adapter setting should be on MYSQLI.
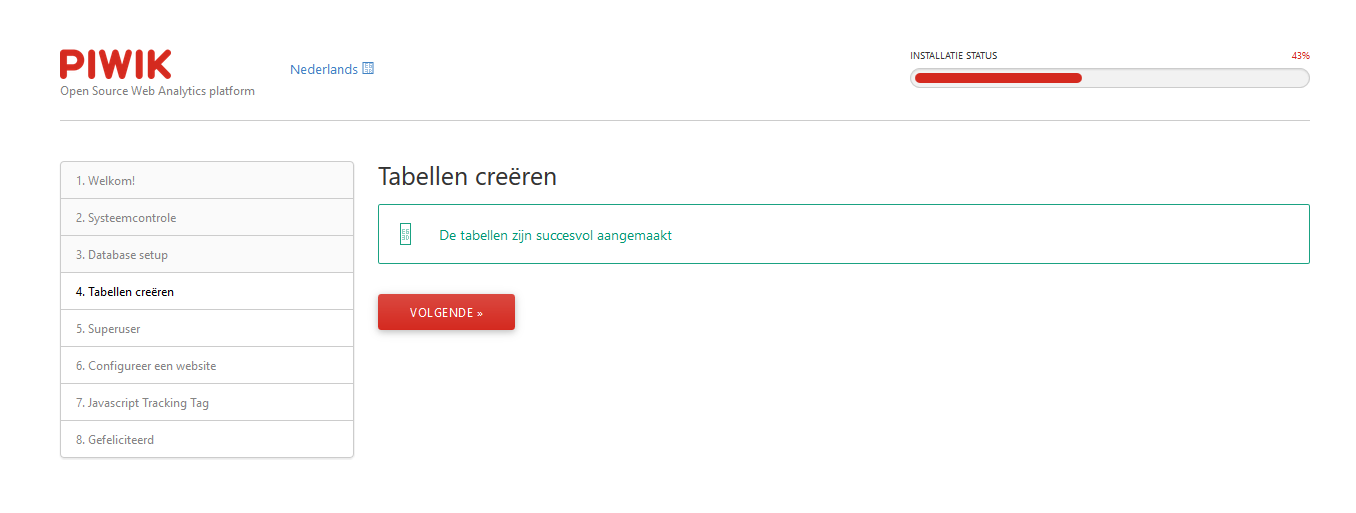
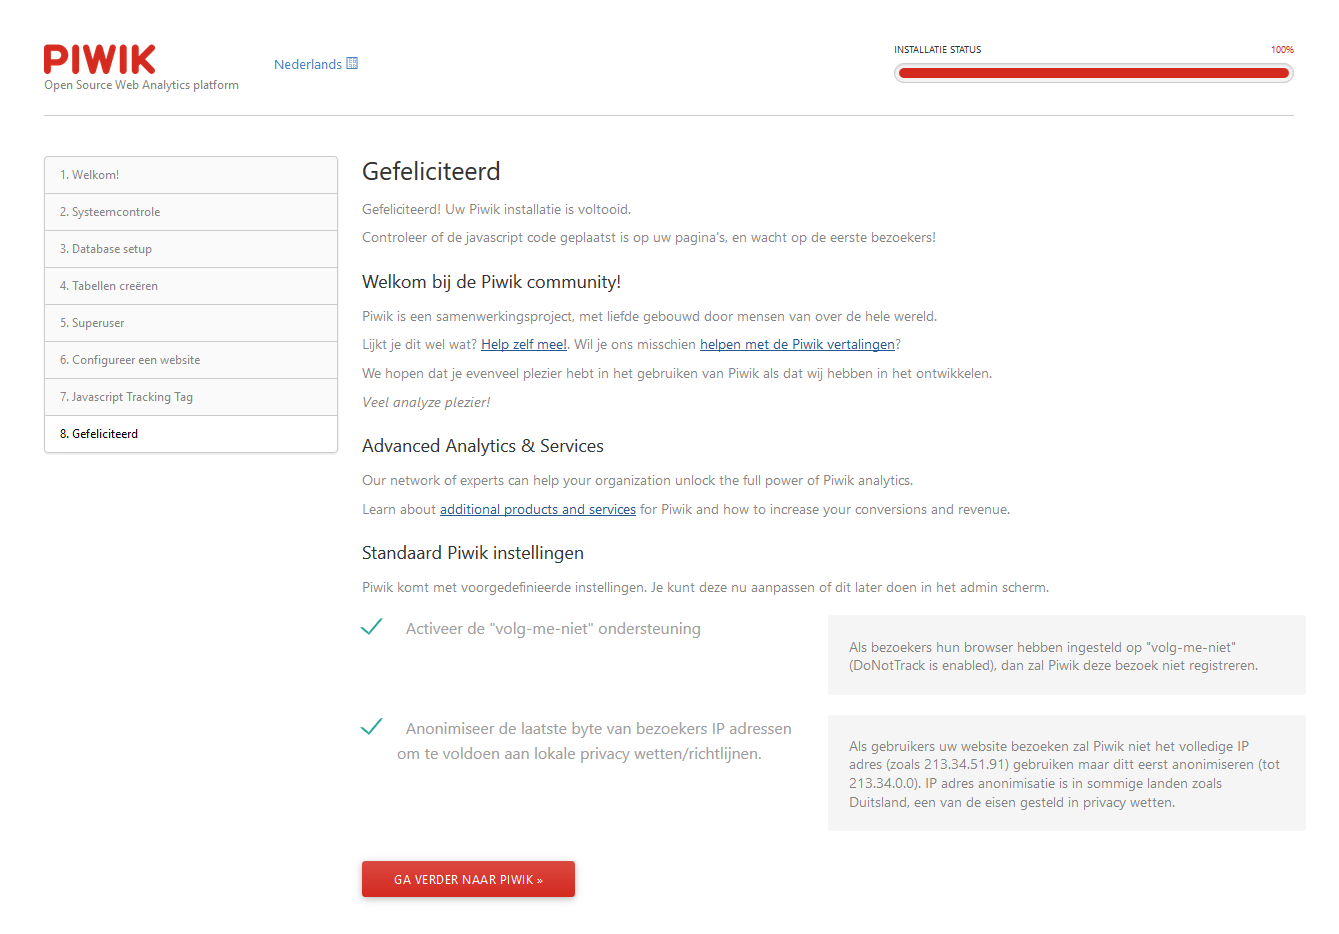
When you press Ok the installation will be completed.
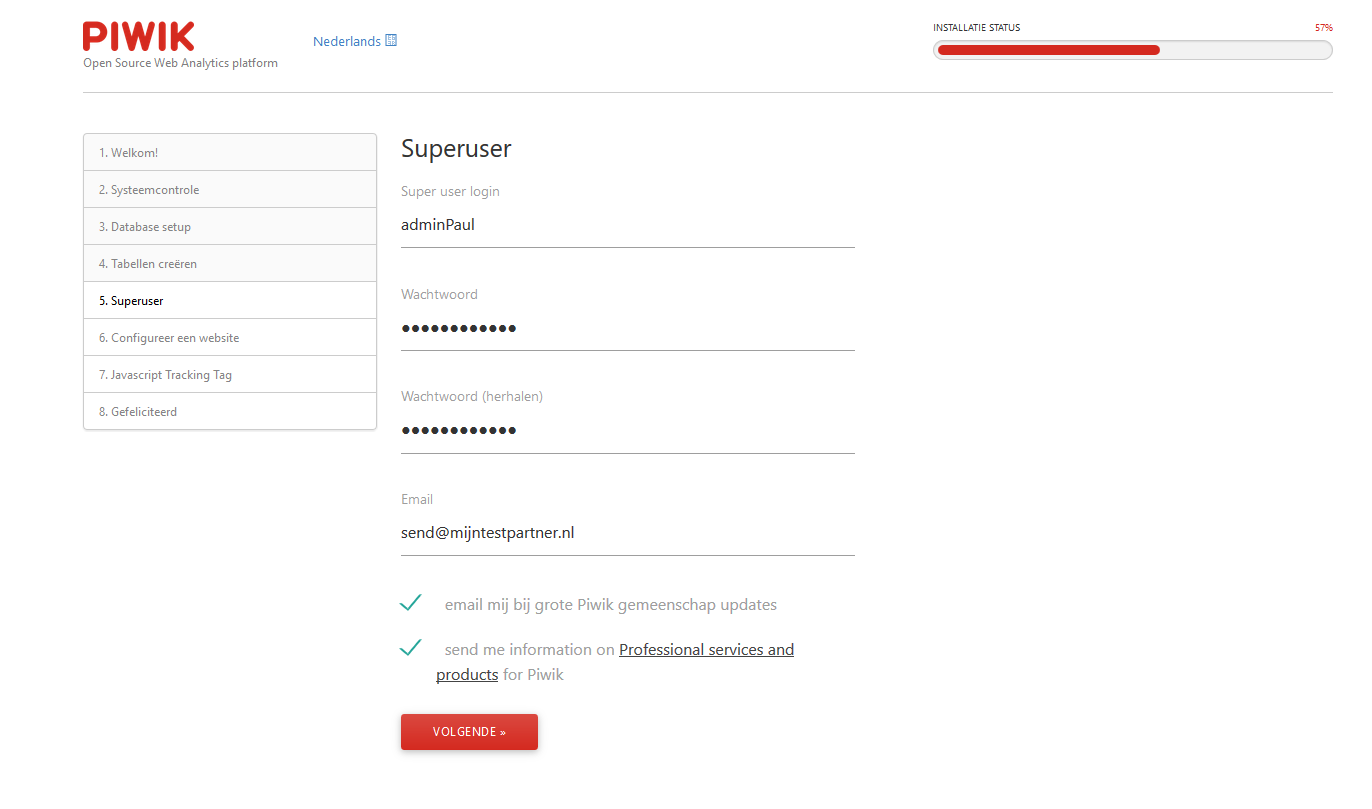
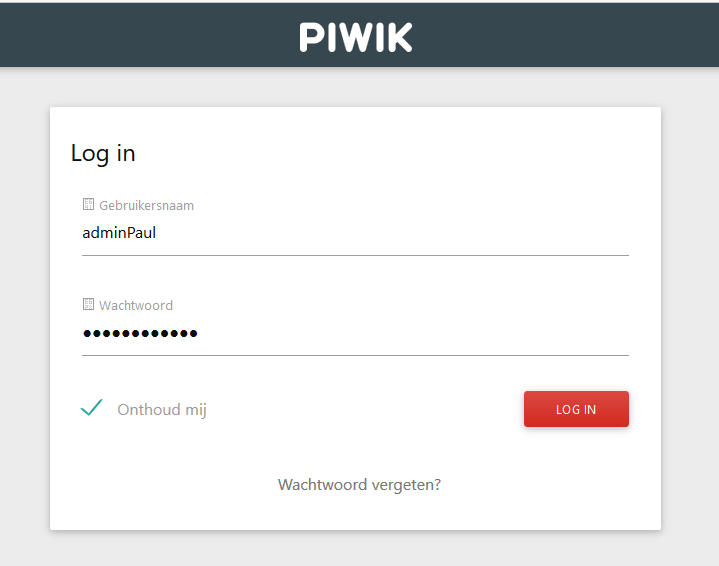
You then create your login account for Piwik. Use a strong password for this and press next again.
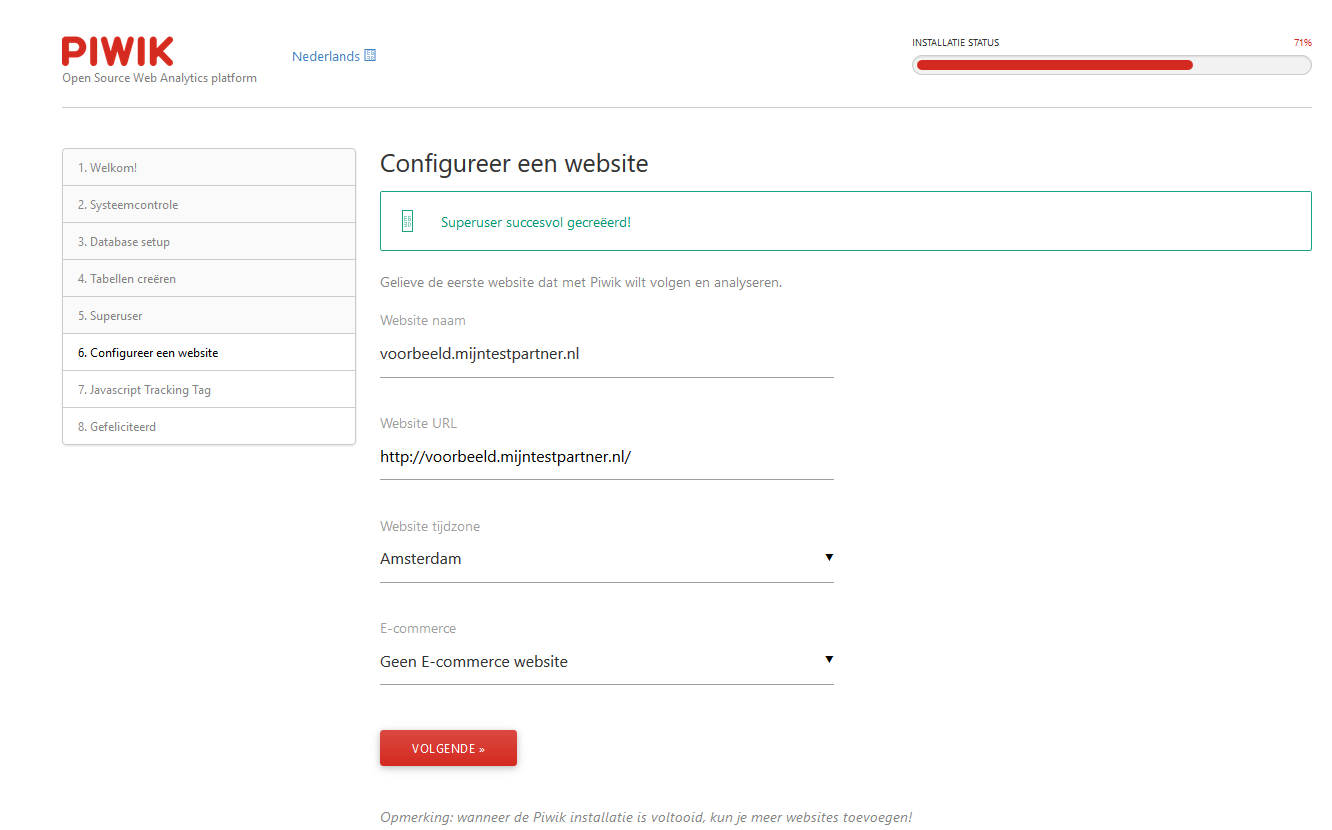
After this you set the last things for the installation such as the time zone and website URLs that you want to monitor.
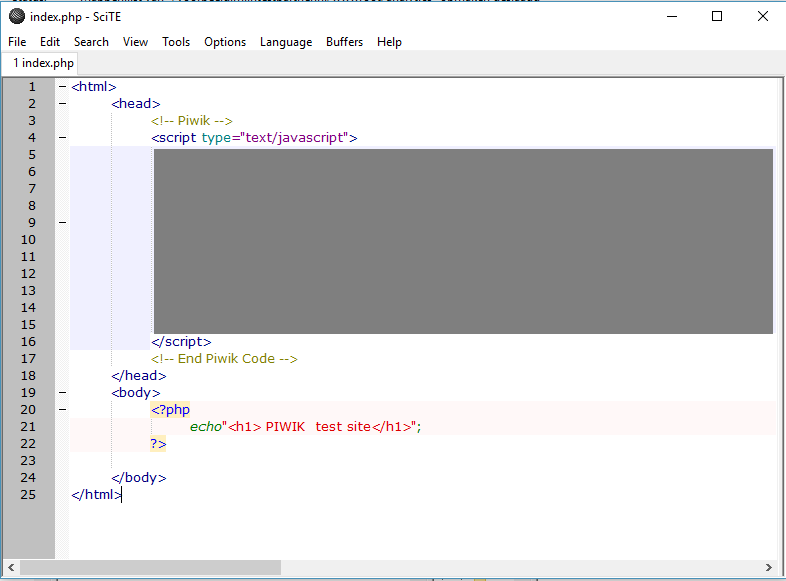
Now we come to the last step to make Piwik active. Piwik needs a tracking script in each page you want to track data from. This piece of code needs to be placed in the Head in the HTML.
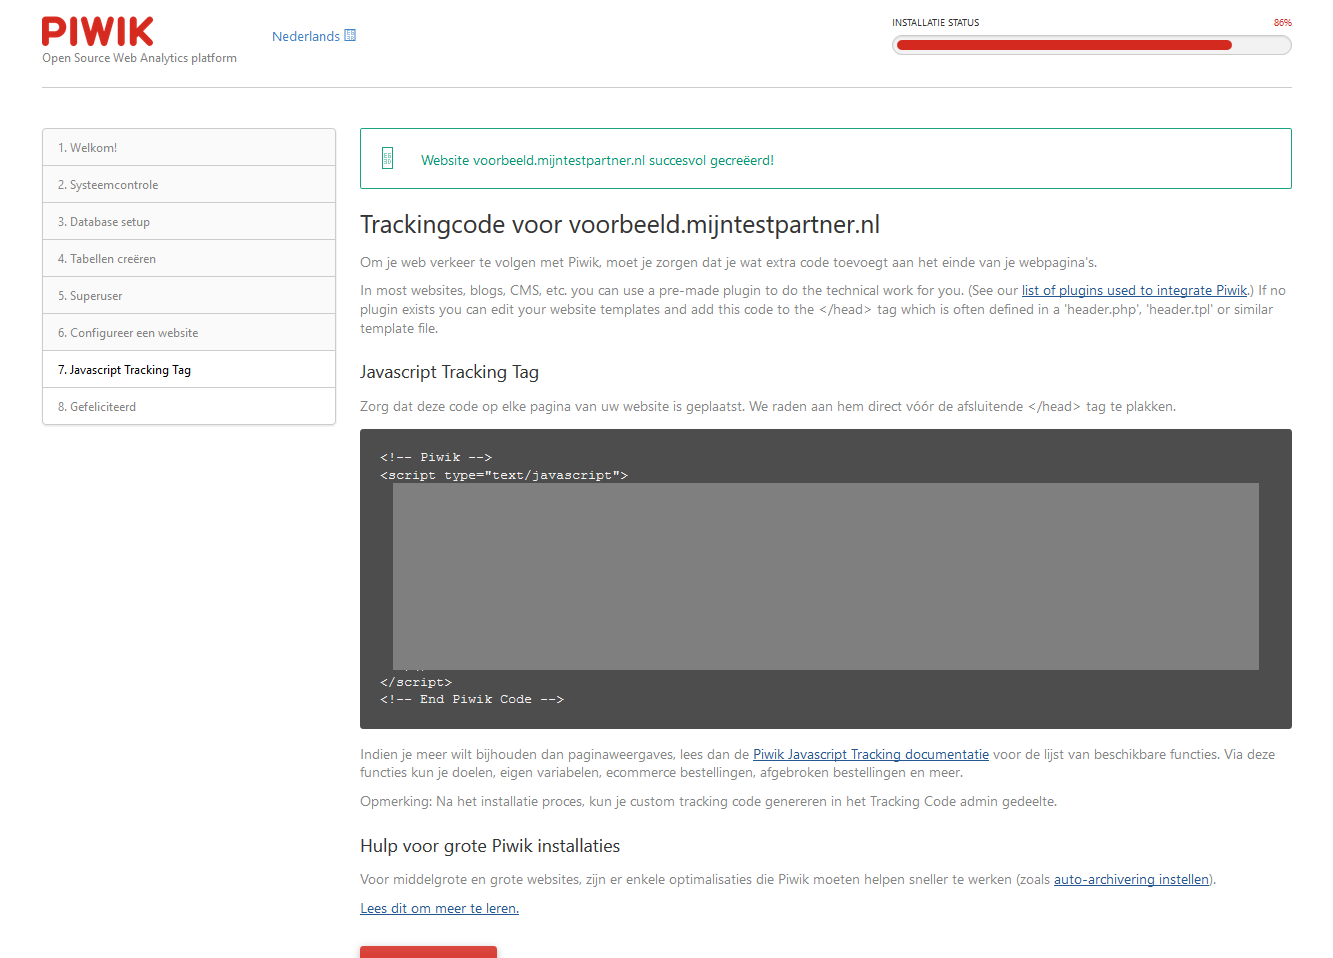
Below is an example of this.
In the next screen you go to the Piwik tool itself and log in with your newly created data.
It can take a while before your pages are visible. A few times CTRL + F5 can bring up the pages.
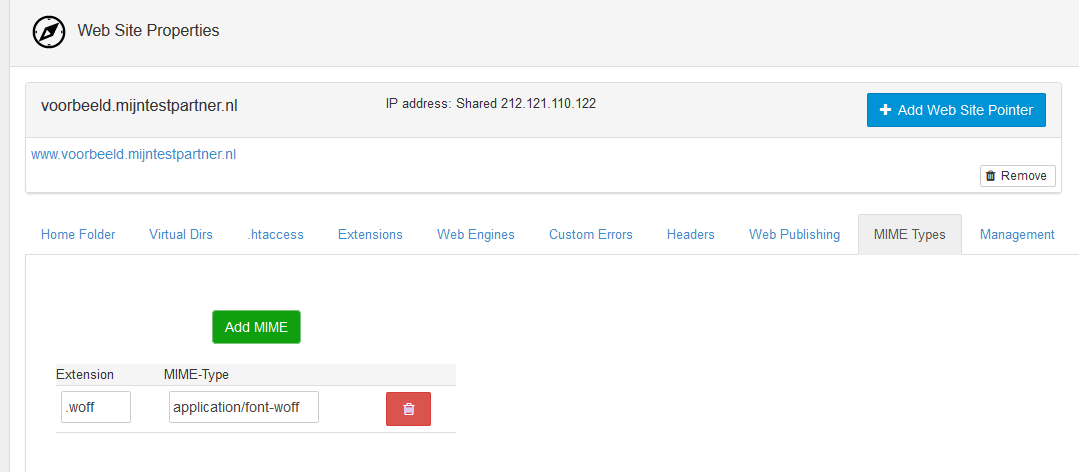
As a last extra step you can add the MIME Type .woff which is necessary for a number of images and templates. You can add it under websites -> Mime Types in the following way:And
these were all the steps needed to install PIWIK in your hosting space, if you have any questions just come on the chat or create a ticket.
keywords: how to install piwik statistics site view installation