
Categories
Installation of PrestaShop
There are a number of things you need to do before starting an installation of PrestaShop:- A MySQL database combined with a user and login.
- An installation package of PrestaShop from the site https://www.prestashop.com/ You will be left with a .zip file after the download process that you can use to continue.
- FTP account and associated data / however, this can also be done through the File Manager in the control panel.
- Make sure that the write permissions on the wwwroot are applied to read and write + applied to all child objects. If you do not know how to do this you can consult the following article.
After the installation, the write permissions can be re-applied to read only, for the security of your website.
Step 1, upload the .zip file to the folder wwwroot.
Once you have received the .zip file from PrestaShop then the next step is to upload it to your hosting space. This can be done via an FTP client such as Filezilla, or in the file manager in the control panel.
The zip file must be uploaded to the folder wwwroot.
Then unzip the zip file to the folder wwwroot and move the contents of the folder: prestashop
1 Place up so that it is directly in the wwwroot of your website. As follows:
yourdomain.com/wwwroot/whole-contents-of-folder prestashopStep
2, installing prestashop
Once you have uploaded the files go to your domain, as long as the files are in the correct folder you will immediately come to the installation screen of PrestaShop.
Follow the instructions on the screen and choose your settings such as your database name for this and user.
The host should be your MySQL host, this can be found in the control panel under Web statistics > view space summary > at the bottom of the page your host is described.
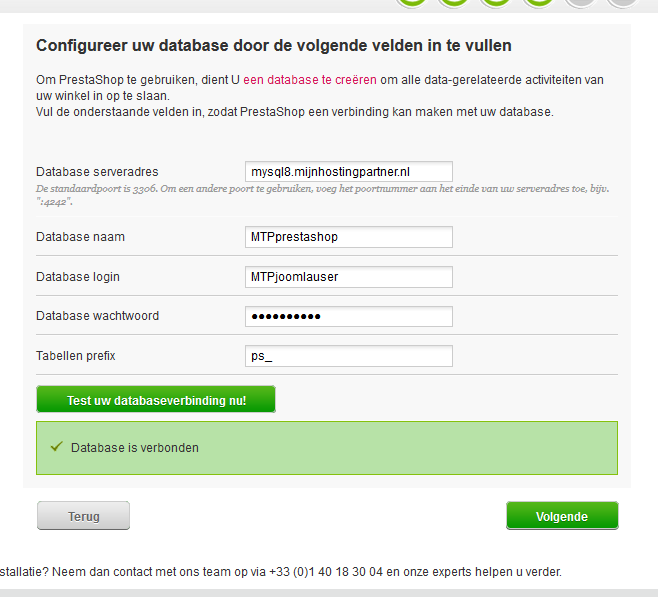
After going through the steps you will get to the last screen of the installation, in this screen your admin information for the site is mentioned again. Save this information carefully.
Step 3, finalizing the installation
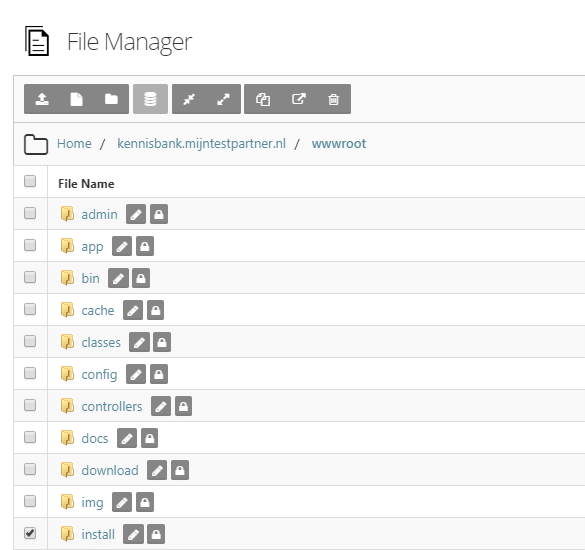
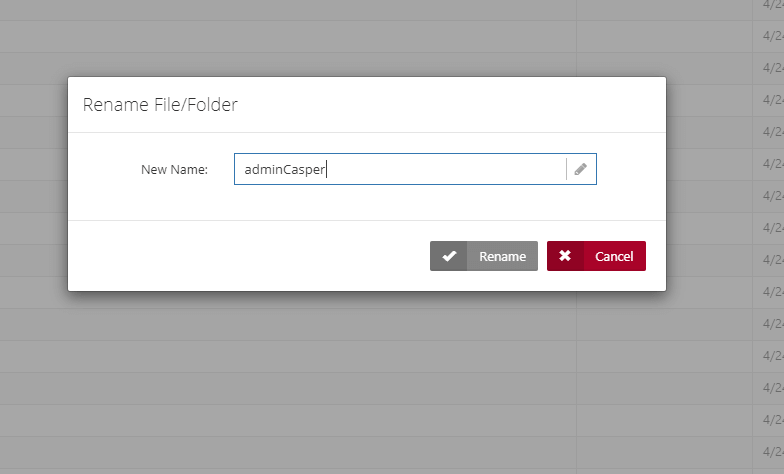
Before you go to your new site you first need to remove your install folder from the wwwroot, also rename the admin folder to a logical name that is easy for you to remember.
Then save this and save it in your browser for example. The url that comes up is then the only way to get into your admin environment.
After this your website will be fully usable and you can start working with your new website.

If you still get an error within the installation PrestaShop always gives a cause for it, often it has to do with the read and write permissions. Or the incorrect placement of files.
If you have any problems with the installation then you can always contact the online chat or create a ticket with an explanation of your problem.
keywords: Presta shop install web shop software