
Categories
Magento Installation
This article covers installing Magento on our servers with the help of:- control panel / Filemanager-
FTP Client Filezilla.
- Text processor like SciTe, Notepad++. Or whatever you are most familiar with.
You see, it is necessary to make a modification in a php file.
- An empty MySQL database with associated user.
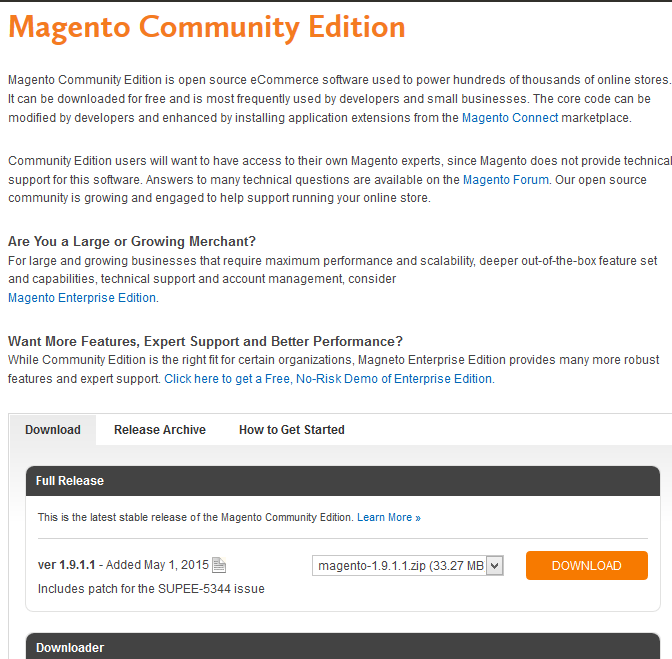
The first step is to download the necessary files from Magento. This can be done directly through the following link: https:
//www.magentocommerce.com/downloadJe you will first need an account before you can download the package of your choice.
- Community edition = Open source
- Enterprise edition = The paid version
In this article we use the Open source version or Community edition. After creating an account at Magento this is a free download.
You select the file to download in .zip format. Below is a screenshot of the download options:
You can save the zip file in an easy place, for example your desktop.
Then you have two options to upload the files to the wwwroot.
- Use the file manager to upload the file to the file manager and then unzip the files using the Unzip function. See how that works here. (Insert link)
- Unzip the file to your desktop, you can use a zip file reader such as 7zip or Winrar to unzip the file. (You can also use the standard Windows tool.)
After this you can upload the files in the folder "magento"
Remember in both cases that in the wwwroot is a web.config file.
Your wwwroot folder should now look like this: 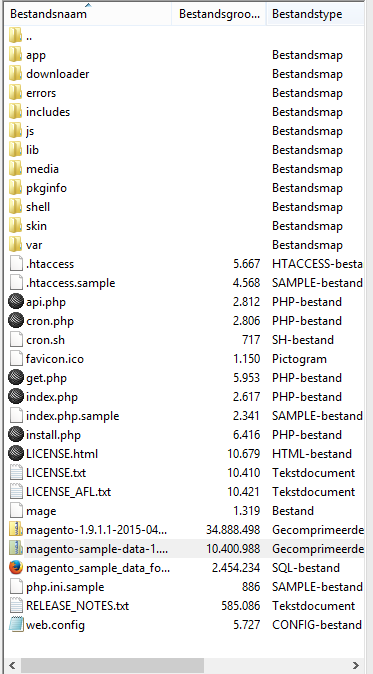
You can now go to your domain name in a browser of your choice, in this example we go to example.mijntestpartner.nl
You change this to your own domain name. Then you come to the next installation screen of Magento: 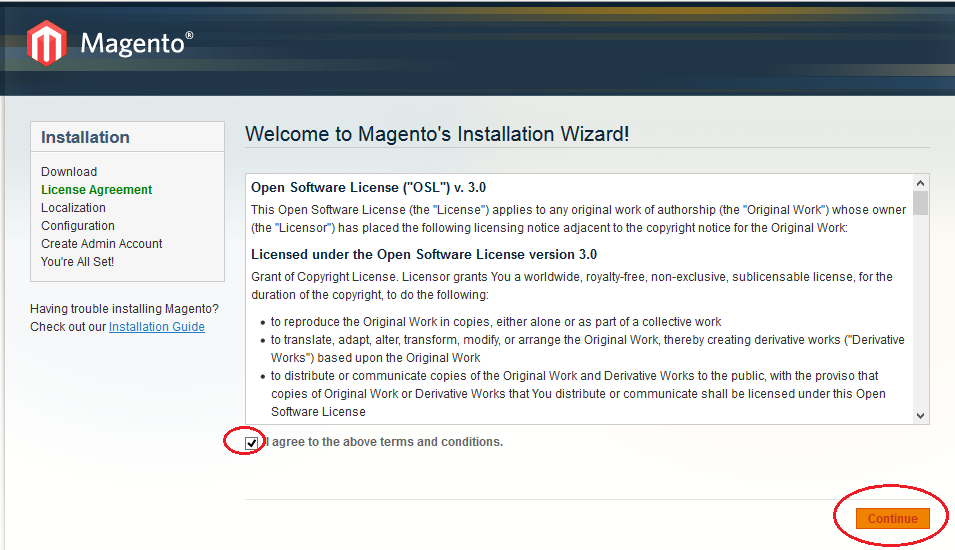
Here you need to agree to the terms and conditions to use the software. Read this carefully.
After reading it you can check the box and press continueIn
this screen you will be asked in which country you are located and what currency unit is used. This can be further adjusted as desired.
In the next screen the database data is asked, which you fill in according to your data. Note that the MySQL host depends on your server. You can check this in the following article.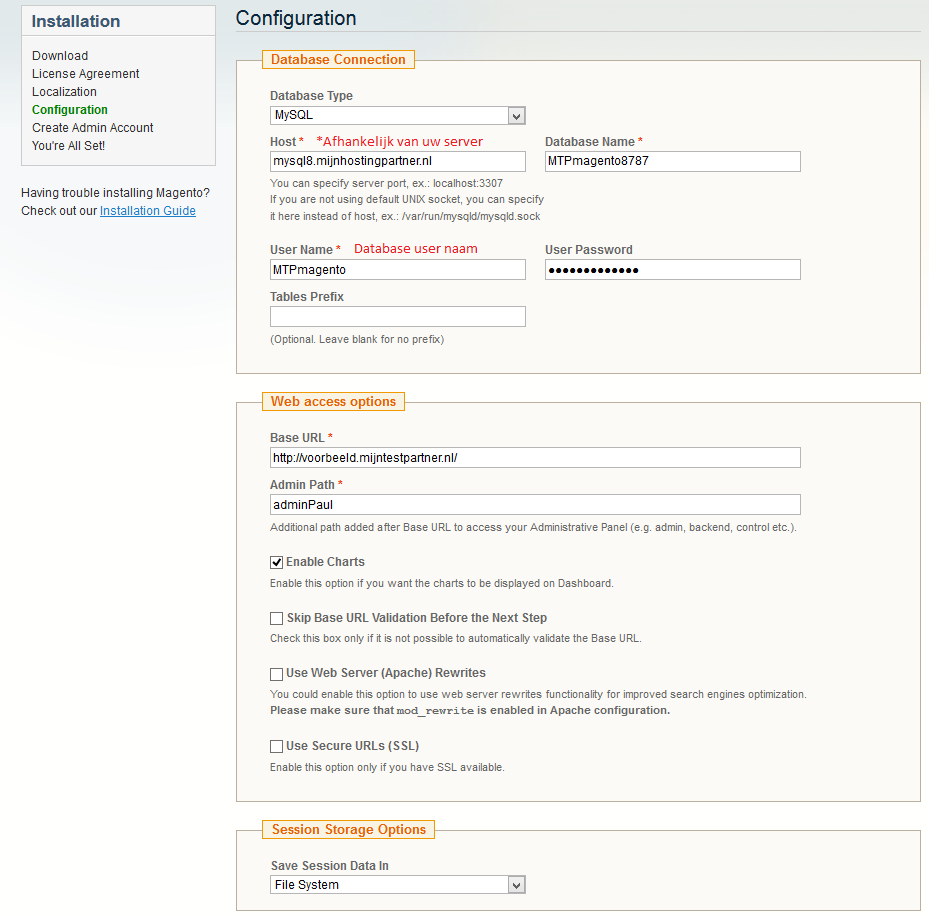
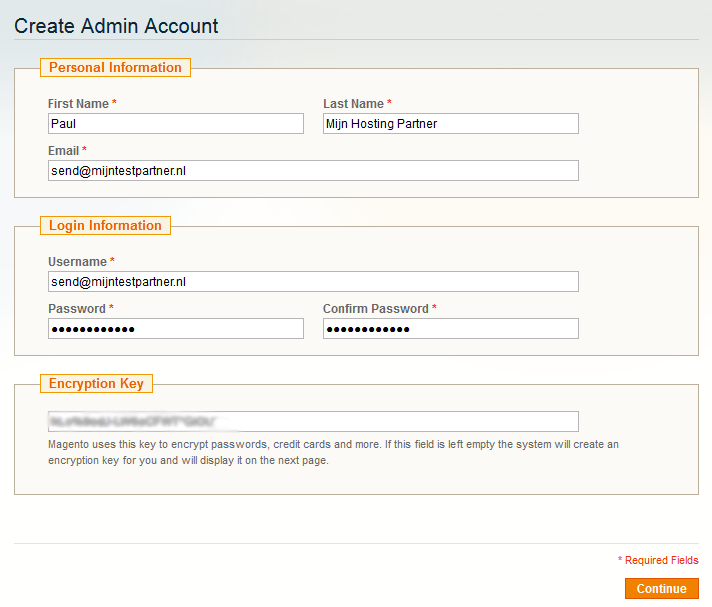
Personal settings
After this it is a matter of entering your personal data, think of a strong password and an encryption key that is strong enough. This is for the security of your shop.
Make sure you save the encryption key somewhere safe. For example on a USB stick or CD in a safe place.
After this you have completed the installation and you can proceed to the backend via the button at the bottom.
If you arrive at the login screen, log in with the data you created.
After this you come to the next screen: 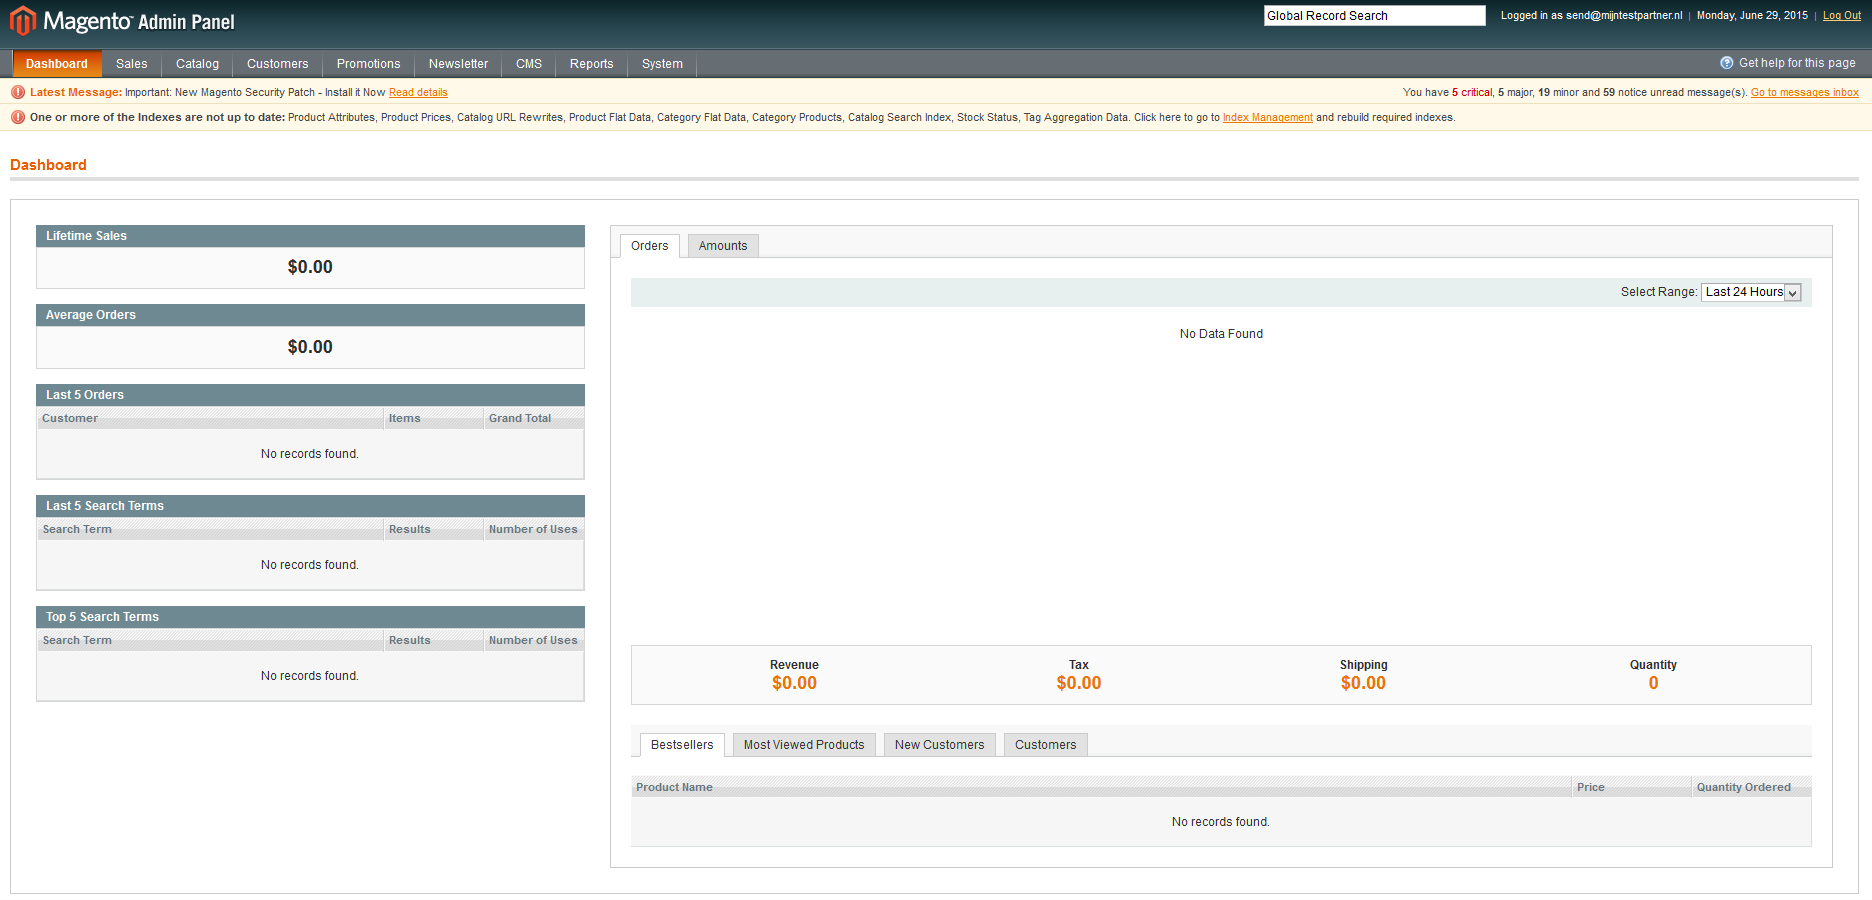
You have now created your webshopFrequent
Error Messages during installation.
- As soon as you try to enter a link or menu you will get an error message with an error log.
To solve this, 2 steps are needed, namely turning on the error messages within Magento.
And resolving the actual error message.
The first step is to have the error message displayed on the page. This can be set up in the following way:
By going in your website files to :
/wwwroot/errors/local.xml.sample
and then changing this file to:
/wwwroot/errors/local.xml
(.SAMPLE off thus)
Second step is to actually solve the error message:
This is solved in the following way:
Navigate to the following file:
wwwroot/lib/Zend/Cache/Backend/File.php
Open this in a text editor and change the line 99 to : 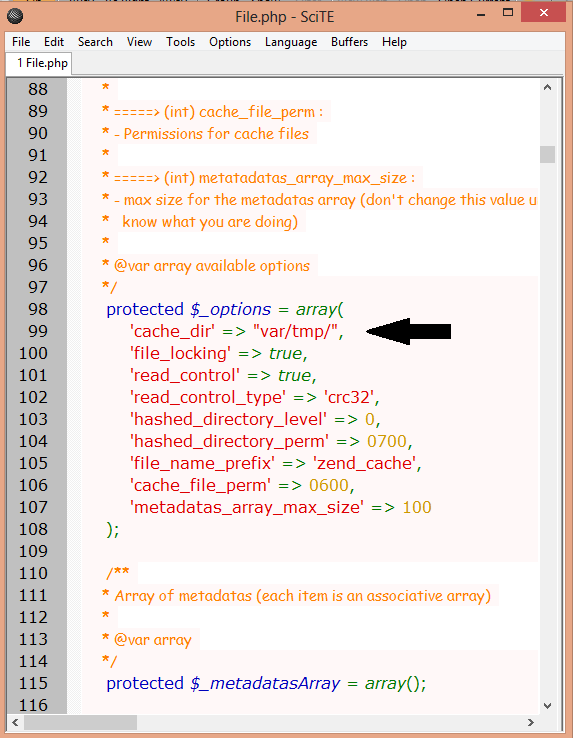
To set this up, you first need to log into the admin area of your website. You can do this via the following link: http:
//www.uwdomeinhier.nl/adminHier. You can login with the data you received from us in the mail.