
Categories
Installing Mautic
Mautic can be installed at MijnHostingPartner.nl in the following way, like any system there are a few things needed before you start the installation. These are the following items:
- FTP account
- MySQL database and user
- Email account
- Basic text editor, or for example NotePad++ for Web.config modification.
To start any installation you will of course need the necessary files, these can be downloaded from Mautic after you provide eea information. You can download the latest version from the following link;
https://www.mautic.org/download
Always get the latest stable version for best results.
There then download a zip file with all the necessary information, you now have two options, or the zip file as a zip to upload to the WWWROOT of your hosting space. It is more than 22,000 files, so generally it goes faster if you upload it as a zip file. And then unzip it using the filemanager in the control panel. The choice is yours.
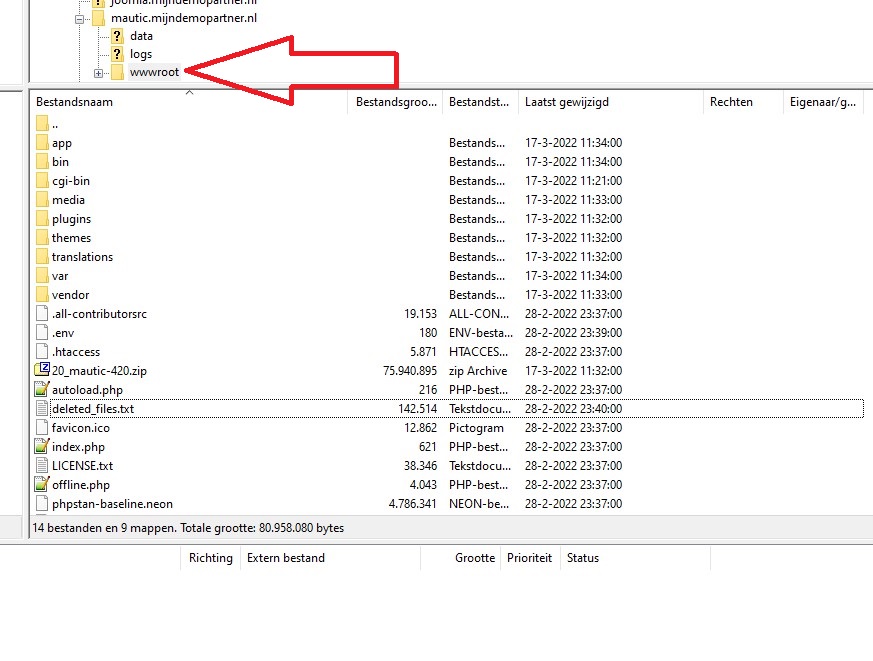
Do not forget to remove the default.htm file, after you have uploaded the files to the correct folder it is necessary to execute full write permissions on these new files. You can do this by executing full write permissions in the control panel.
Then open a new window in your browser to the website where you want Mautic installed, then the following screen appears if you have completed the previous steps correctly.
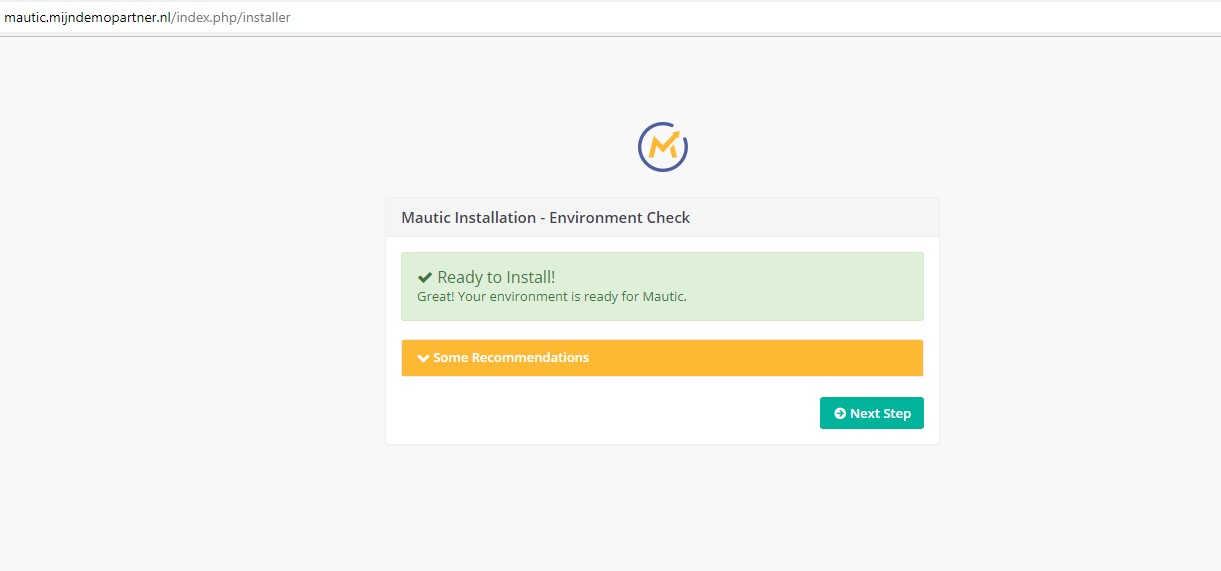
You can then continue to the Next Step.
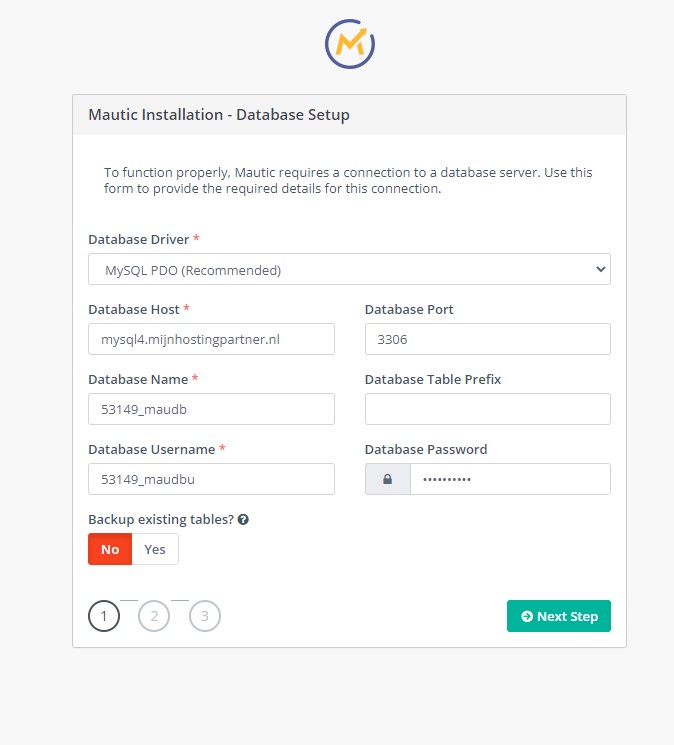
The database settings can then be entered in the screen. These are the data you can create in the following way:
Make sure that you enter the correct host, and do not include foreign characters or spaces in the data. After this you can proceed to the next step. This is the adminsitrator data for the site. This can be set up as you wish.
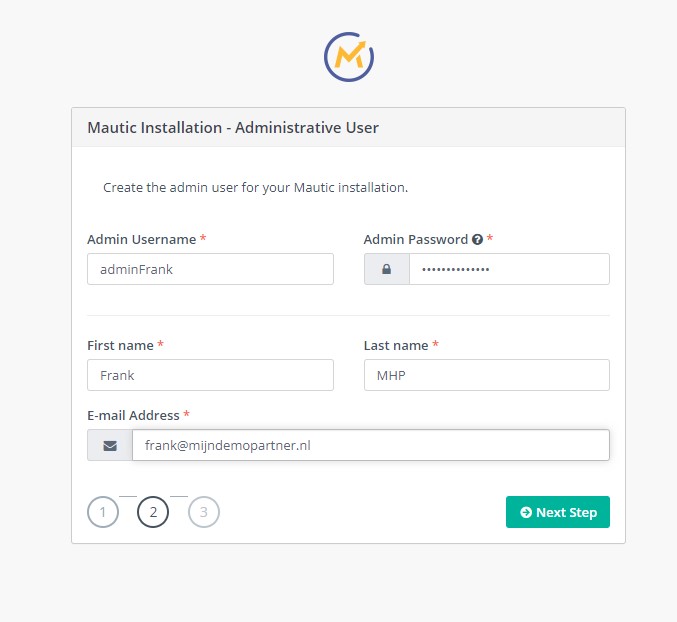
After this you can proceed to the next step. These are the mail settings which can be configured as follows
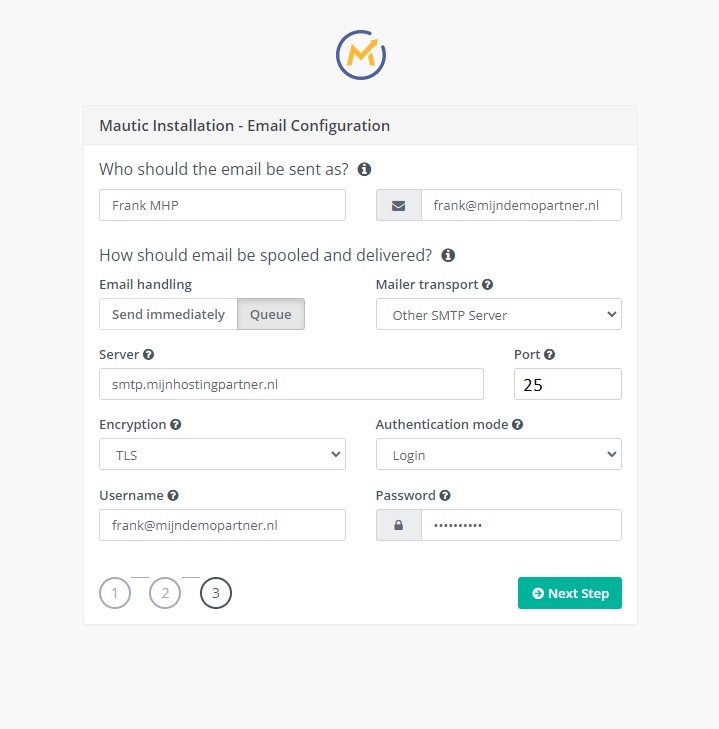
The settings are based on the screenshot, just enter your own mail address and password. Port 25 with TLS and Login should be maintained.
After this you can proceed to the next step, after this it is only necessary to adjust the web.config with the necessary rewrite rules. This is done by opening the web.config file via FTP or the file manager, and adding the following lines:
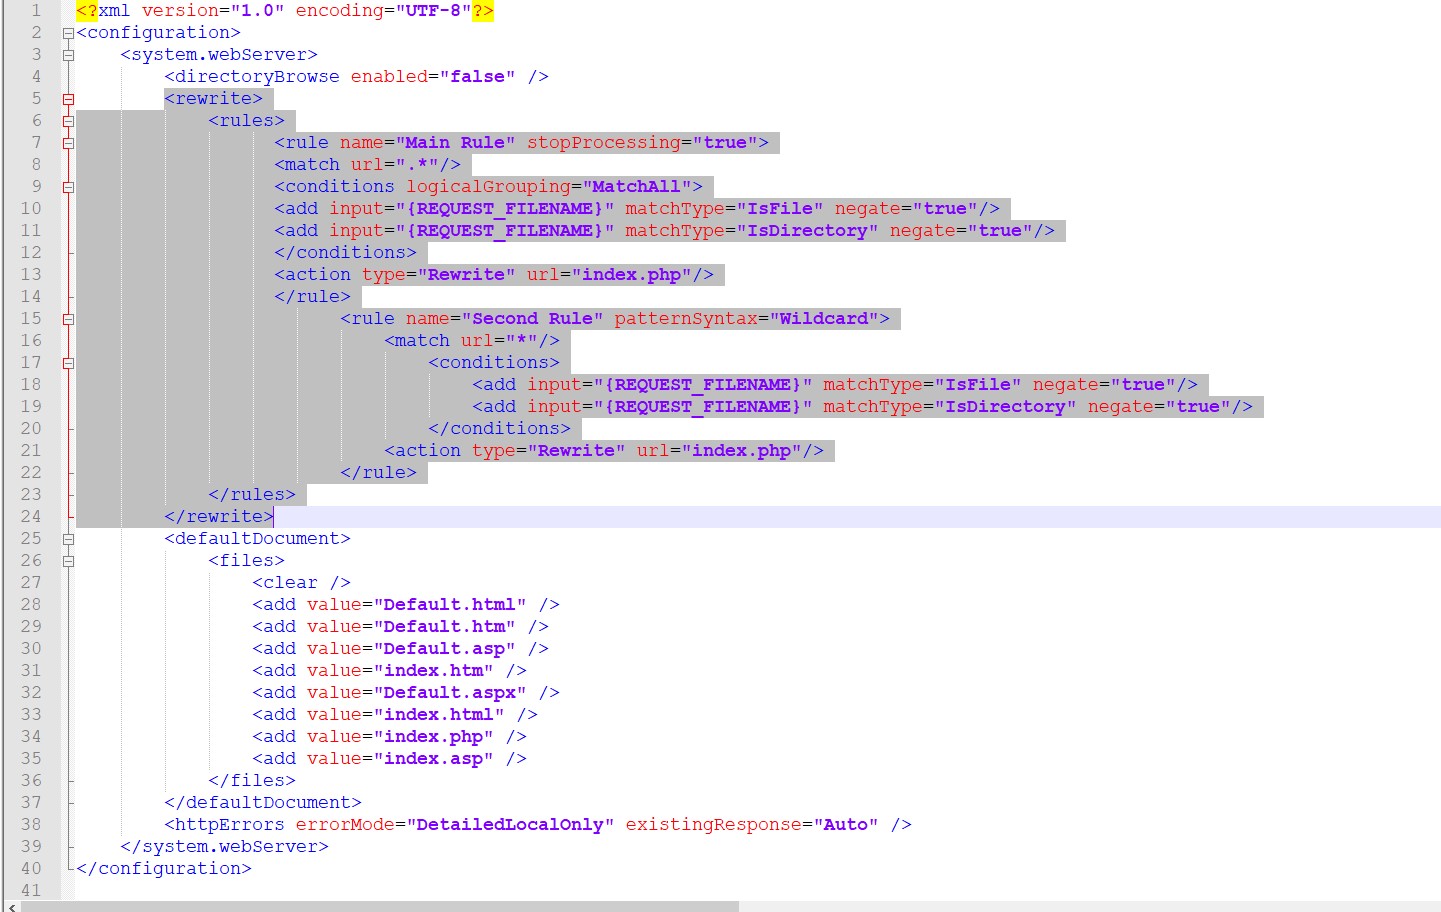
After this, you can go to the login screen and log in with your credentials that you created for Mautic.
<?xml version="1.0" encoding="UTF-8"?>
<configuration>
<system.webServer>
<directoryBrowse enabled="false" />
<rewrite>
<rules>
<rule name="Main Rule" stopProcessing="true">
<match url=".*"/>
<conditions logicalGrouping="MatchAll">
<add input="{REQUEST_FILENAME}" matchType="IsFile" negate="true"/>
<add input="{REQUEST_FILENAME}" matchType="IsDirectory" negate="true"/>
</conditions>
<action type="Rewrite" url="index.php"/>
</rule>
<rule name="Second Rule" patternSyntax="Wildcard">
<match url="*"/>
<conditions>
<add input="{REQUEST_FILENAME}" matchType="IsFile" negate="true"/>
<add input="{REQUEST_FILENAME}" matchType="IsDirectory" negate="true"/>
</conditions>
<action type="Rewrite" url="index.php"/>
</rule>
</rules>
</rewrite>
<defaultDocument>
<files>
<clear />
<add value="Default.html" />
<add value="Default.htm" />
<add value="Default.asp" />
<add value="index.htm" />
<add value="Default.aspx" />
<add value="index.html" />
<add value="index.php" />
<add value="index.asp" />
</files>
</defaultDocument>
<httpErrors errorMode="DetailedLocalOnly" existingResponse="Auto" />
</system.webServer>
</configuration>