
Categories
Installing WordPress within Linux
To install WordPress within your Linux package you can follow the following steps within Webhoster.nl, after purchasing your Linux package go to My Products to get started with this.
Select the product on which you want to install WordPress
Then go to Applications
Select the domain name you want to install WordPress on
Under PHP select the main domain name you want to install WordPress on, or continue with a subdomain where you want to perform this.
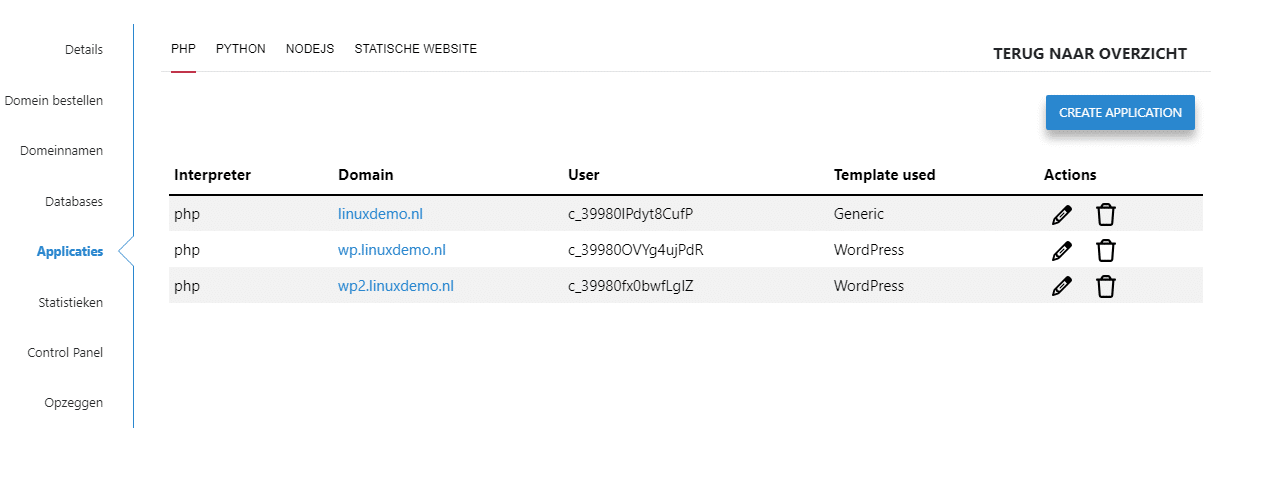
In this example we will create a new subdomain for this with Create Application, enter the name of the subdomain and select the desired PHP application, it is recommended to always choose the latest available one for this. After this, in the last drop down select the option for WordPress in the list, and click Create to create it.

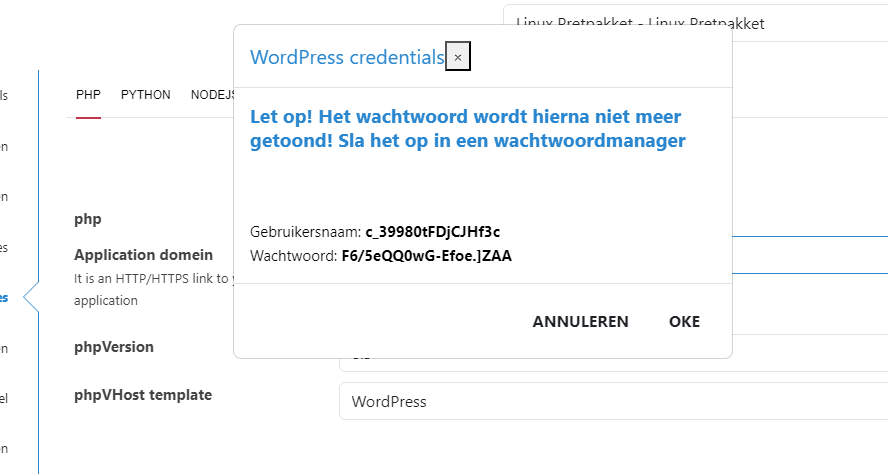
After a few minutes you will see the following pop up with your WordPress administrator details in it. Save these somewhere, because they won't be easy to see after this.
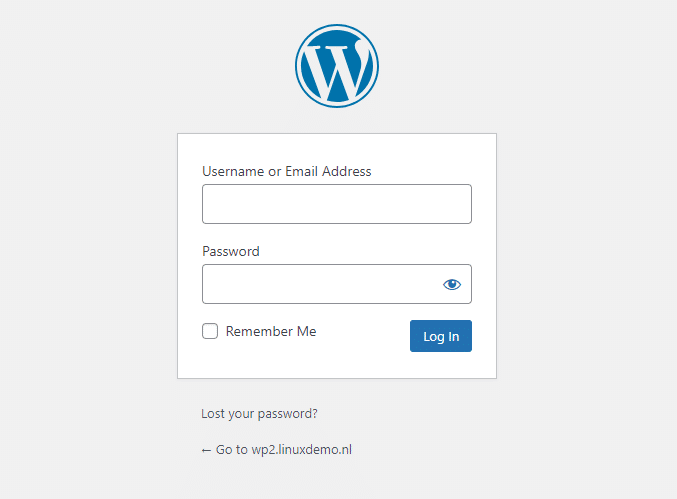
After this you can go to your domain name and login with it by filling in the following link for your website:
/wp-admin/index.php
So put this behind your domain name in a browser to continue.
After this you will be taken to the WordPress login screen, and you can log in with your previously shown credentials:
After this you can get started with your WordPress website, and further set it up as you wish.
By default, this WordPress installation uses a MariaDB database, which you can view under Databases within the client panel. As soon as you change the user password of the database, you need to update this password in the wp-config.php as well. So please keep this in mind.
To access the WordPress files directly you can use FTP, or you can set up an SSH connection for this. See the relevant information in the client panel for this.