
Categories
WordPress install via customer panel
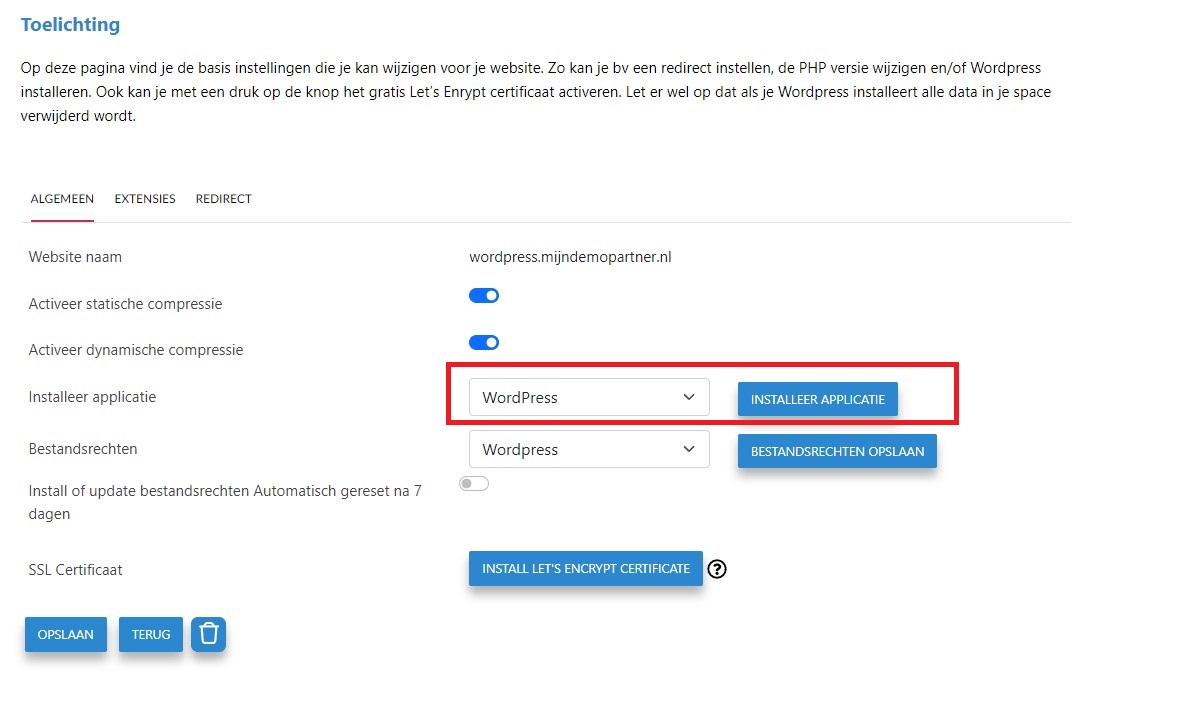
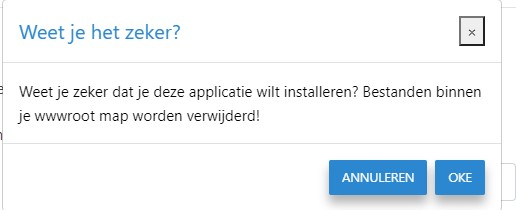
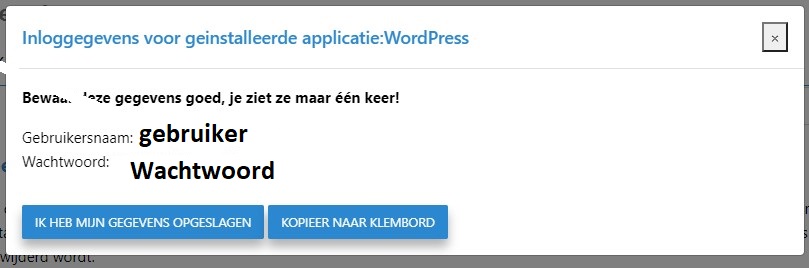
How to install WordPress.
*Note: Installing the latest version of WordPress requires PHP 7.0 or higher. You can change this by logging into the control panel then navigate to web > websites > your domain > extensions.*Here is the guide to install WordPress the FTP way.You have enough with a MySQL database and associated user.This article explains how to do this through the filemanager in the control panel.Optionally, you can also work with an FTP account and FileZilla.The steps are not described here, however, this guide is roughly to follow.
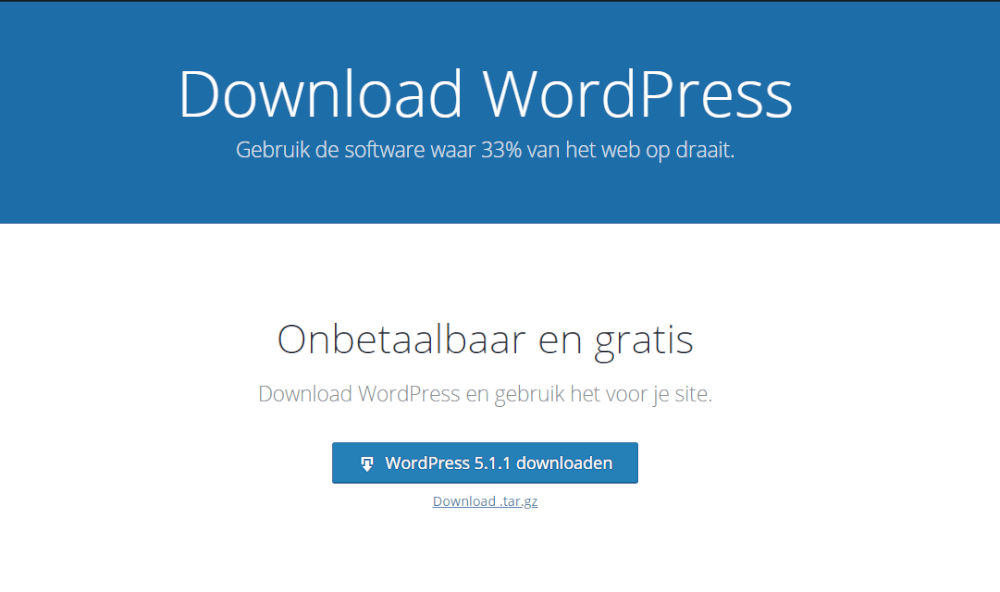
Step 1 Download WordPress
Go to the WordPress site to download the latest version of WordPress : WordPress
Press Download WordPress and save the file.

Step 2 Install WordPress
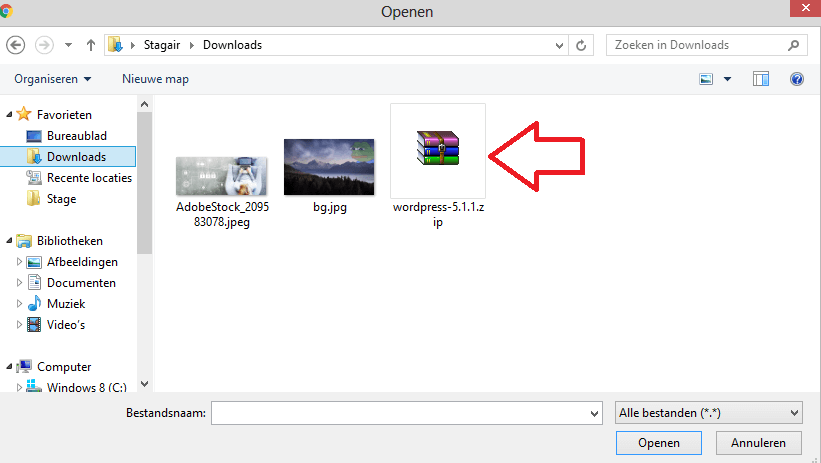
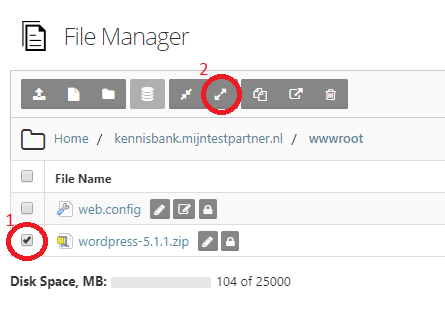
Unzip your .zip file of WordPress and upload it in its entirety to your hosting space.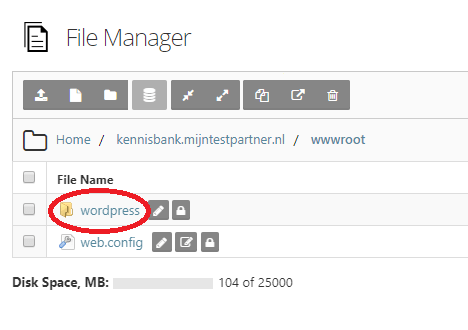
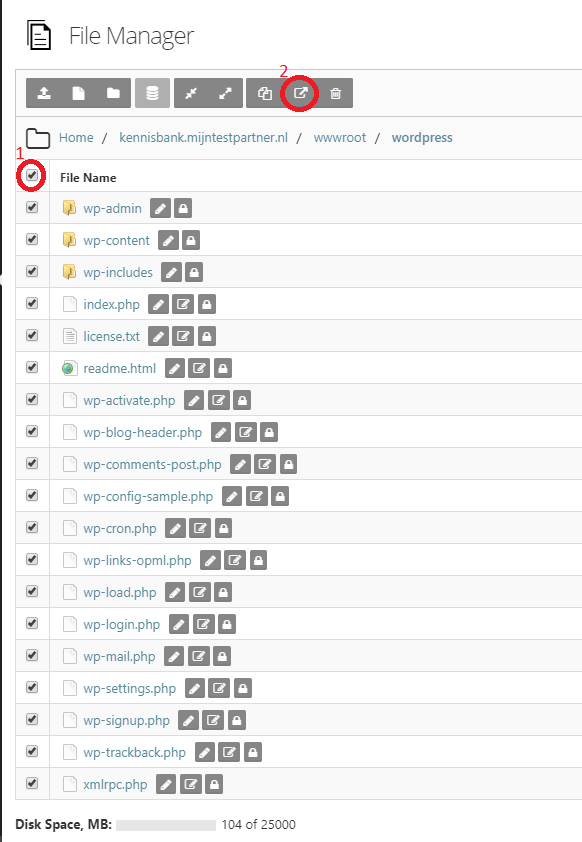
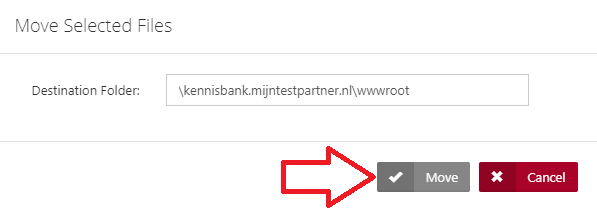
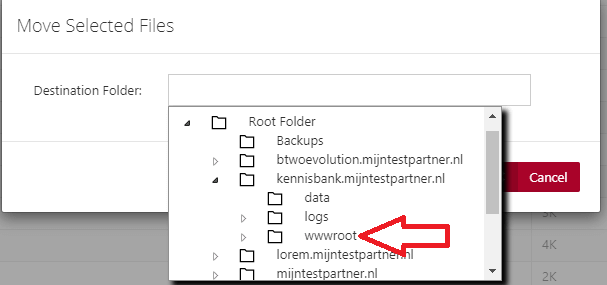 After this unzip the files and move them 1 folder up.If you don't need any further explanation you can go directly to step 5.If you need some more explanation you can follow the screenshots below:
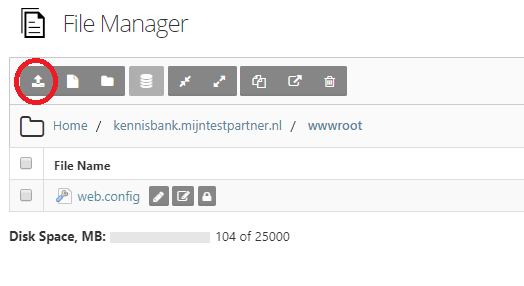 ---------------------------------------------------------------------------------------------------------------------------------------------------------------------- -----------------------------------------------------------------------
 ------------------------------------------------------------------------------------------------------------------------------------------------------------------------------ ---------------------------------------------------------------
 --------------------------------------------------- ------------------------------------------------------------------------------------------------------------------------------------------------------------------------------------
Step 5 Installing WordPress
Remember to set read and write permissions for your page on the wwwroot this can be done in the file manager this way.
Step 6 Install WordPress
For the next steps you need the MySQL database, plus associated user and password. Remember that the database name and user are case sensitive, so you need to keep them handy for the next steps.
Step 7 Install WordPress
Go to the url of your website in our case www.WordPress.mijntestpartner.nl. You can go to the URL in any internet browser and see the following screen :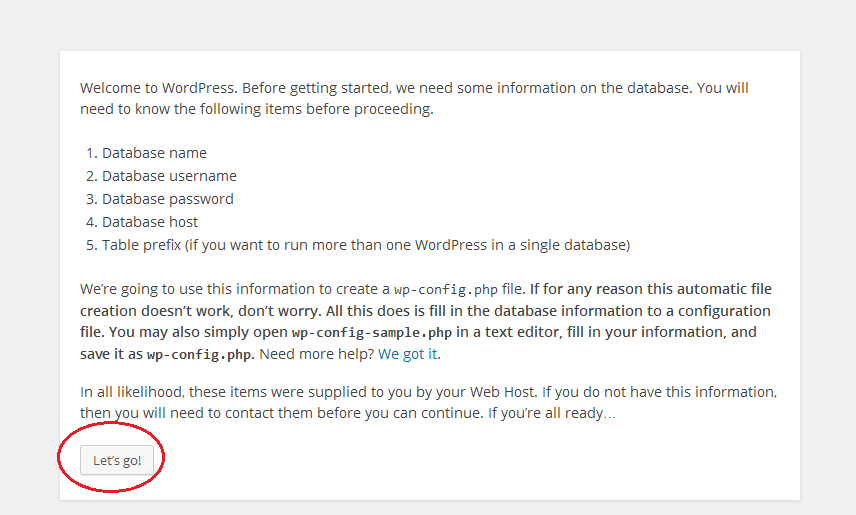
Step 8 Install WordPress
Fill in your data.- MySQL database name.- MySQL User- MySQL passwordYou can always check which MySQL server you are on by going to the control panel.Then you can click on space statistics, and on the right view space summary. At the bottom you will find a description of your MySQL server, which isoften not mysql1.myhostingpartner.nl.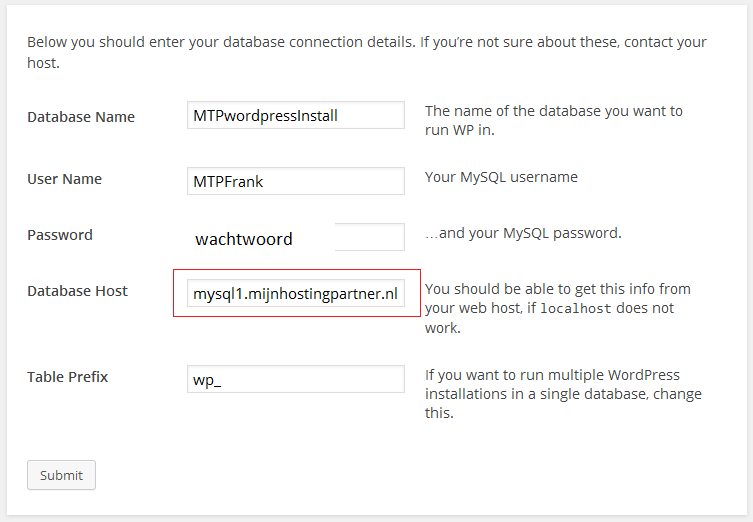
Step 9 Install WordPress
After this you fill in your personal data, use a strong password !If you want to create a strong password for this you can use the password generator.Save this password in a safe place, so if you forget it you can easily come back to it.
Step 10 Install WordPress
Login with your just created credentials.
Step 11 Install WordPress
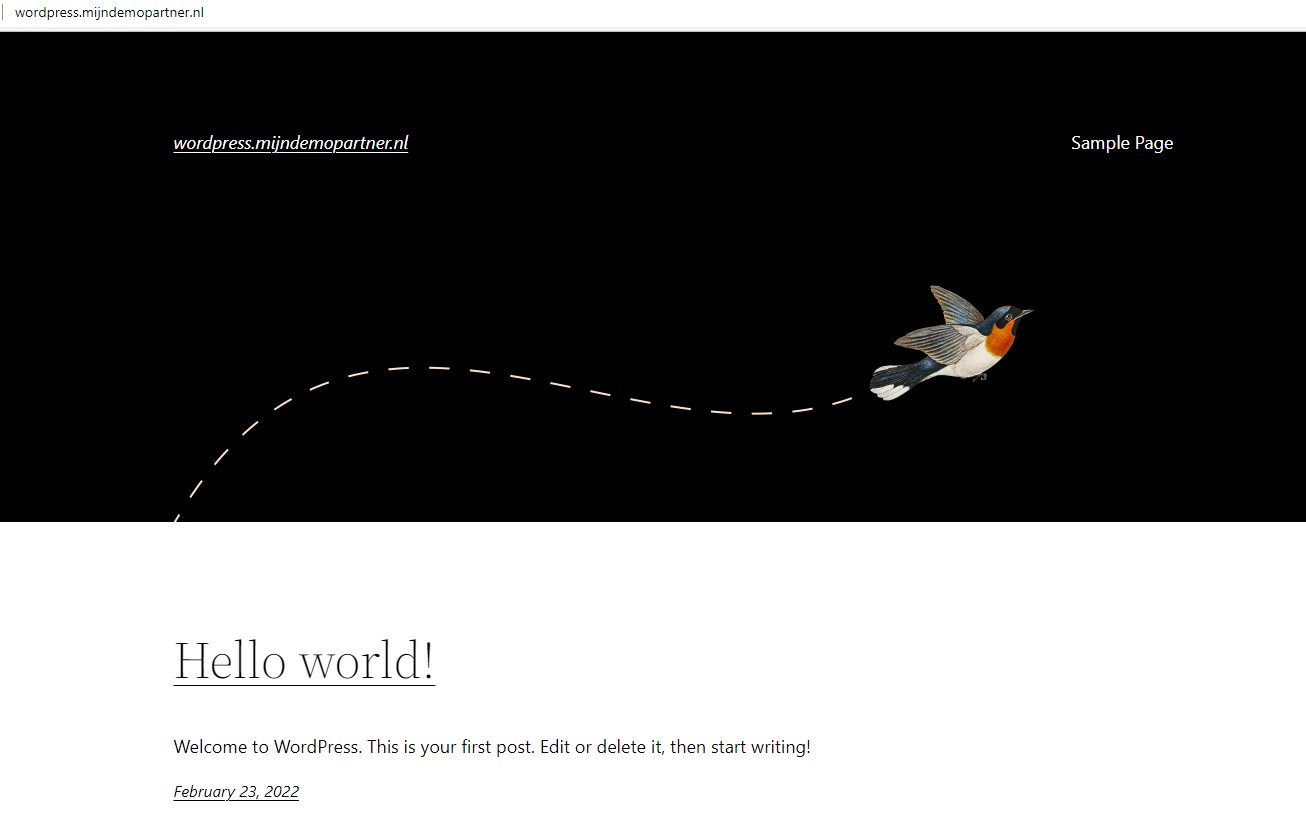
You are now ready to start working on your website.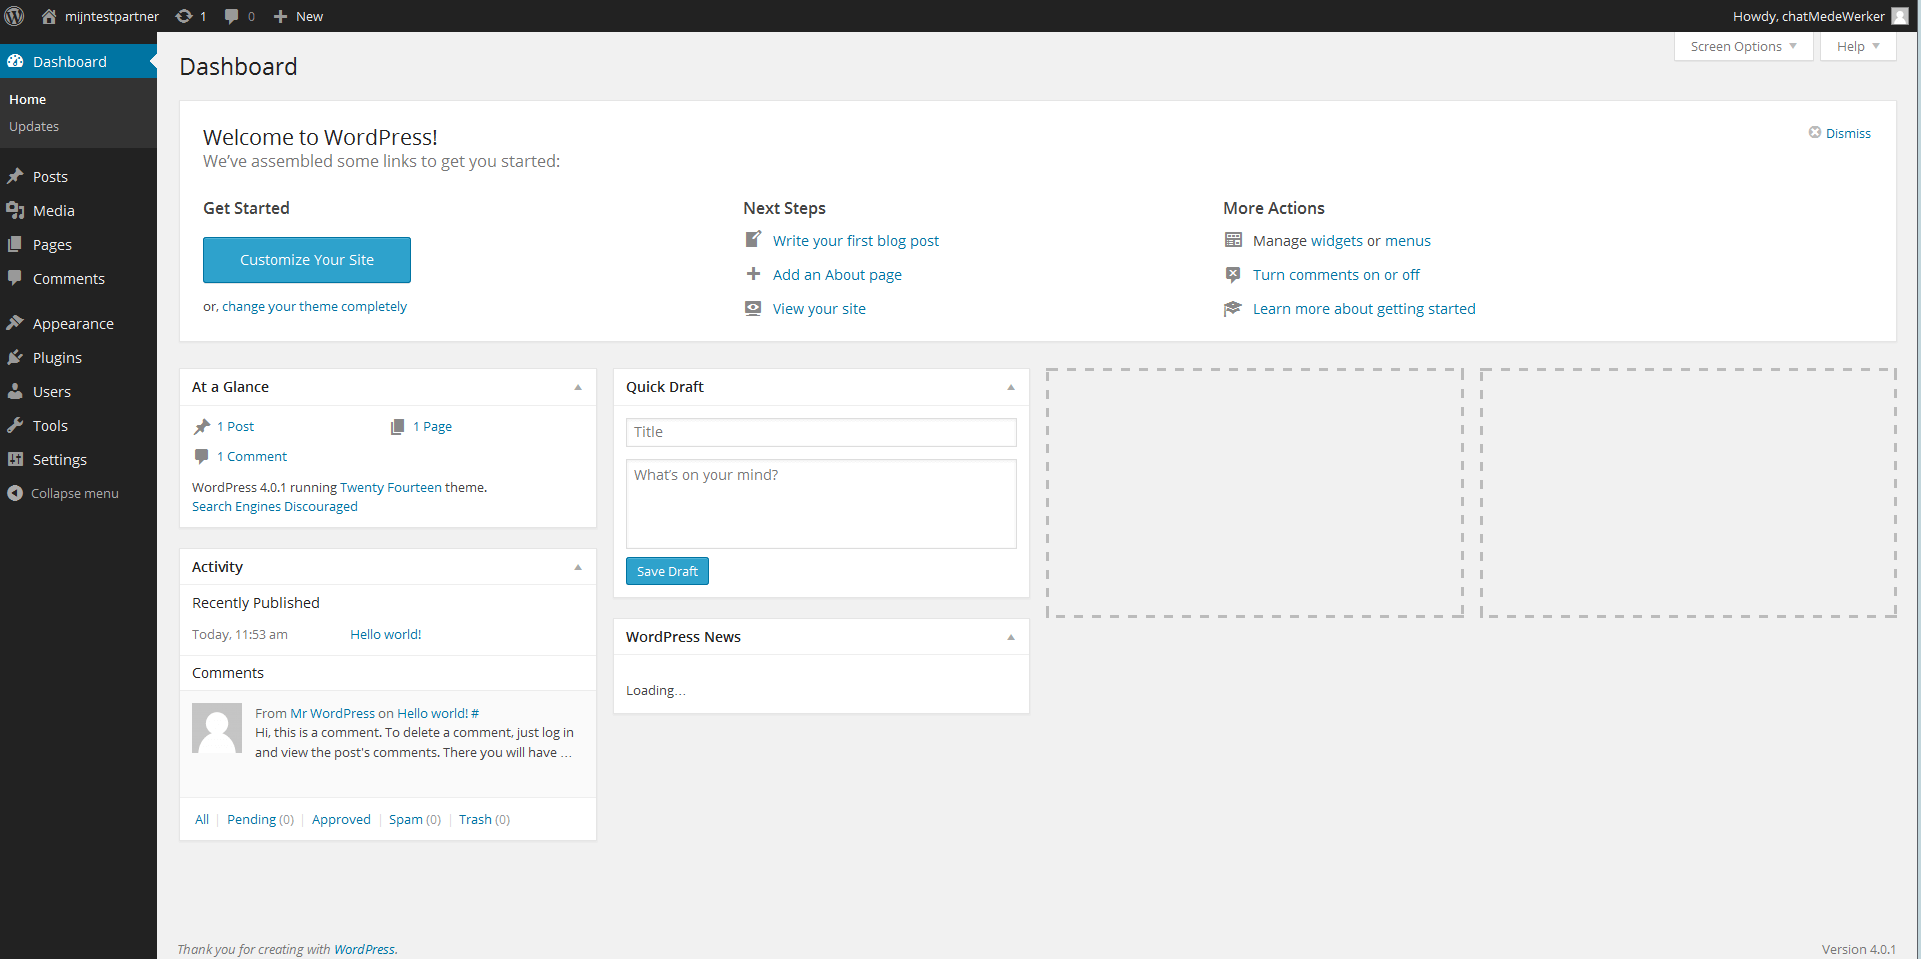 Troubleshooting when installing WordPressIfthe default.htm page of MijnHostingPartner.nlappearsthen you have the default in the wwwroot. The web.config file refers to this file first. To fix this you can remove the following file from the wwwroot:Default.htIf you are having problems with the read and write permissions on your installation you can find out how to do that in this article.If you want more information about the further steps with WordPress you can read up on the WordPress forums. https://WordPress.org/support/Voorsuggestions or comments/tips about this article, you can contact us via the chat or a ticket in the customer panel.Keywords : WordPress install WordPress word press installation guide Windows