
Categories
Installing Joomla from the Joomla Site
Here is the guide to install Joomla with the installation .zip file available on the joomla.org. site.The installation is a relatively simple process and will be explained a bit in this article. If you follow the instructions given here then it will go without a hitch.
You need a few things before you start this. Namely:
- A MySQL database, or variant. Can be created in the control panel.
- An FTP account, mostly in this article we do it in the filemanager so the environment is the same.
- The.zip file with the latest Joomla version from this link.
Step 1
If you have clicked on the link above and are already on the Joomla site, then it is a matter of downloading the Joomla .zip. Do it this way :
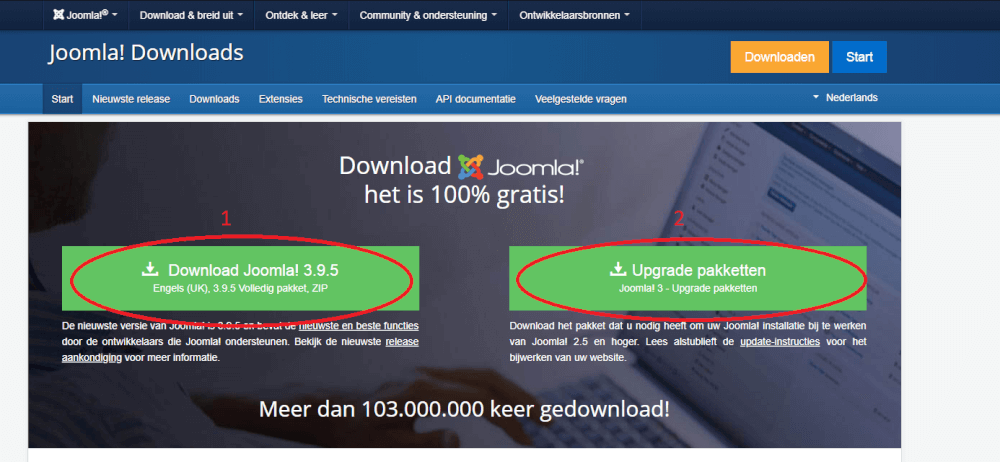
1 is the option you must have for this.
2 can be visited later for options and add ons for Joomla.
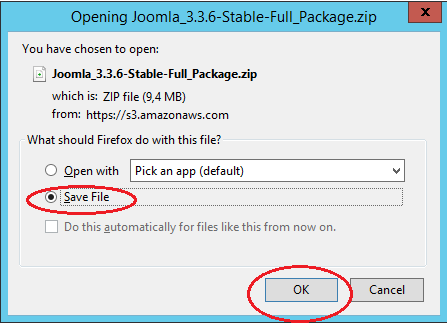
Step 2
You download the file and save it in a logical place. For example your desktop or your downloads folder.
Step 3
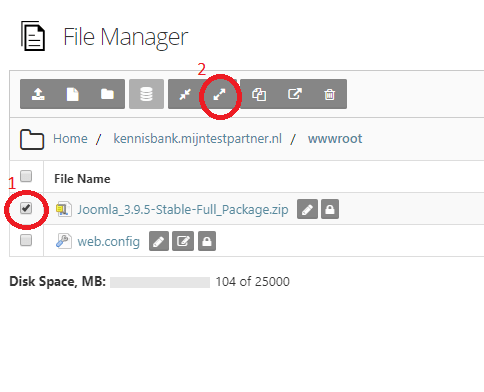
The next step is to upload the file using an FTP client or the file manager. Below the filemanager:
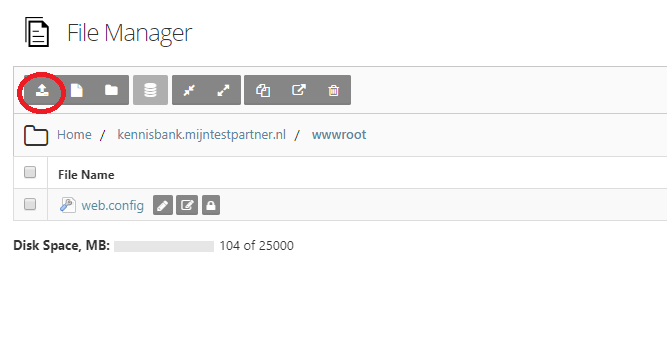
Zip file must be in the wwwroot of your hosting space. In this case so joomla.mytestpartner.nl/wwwroot/.
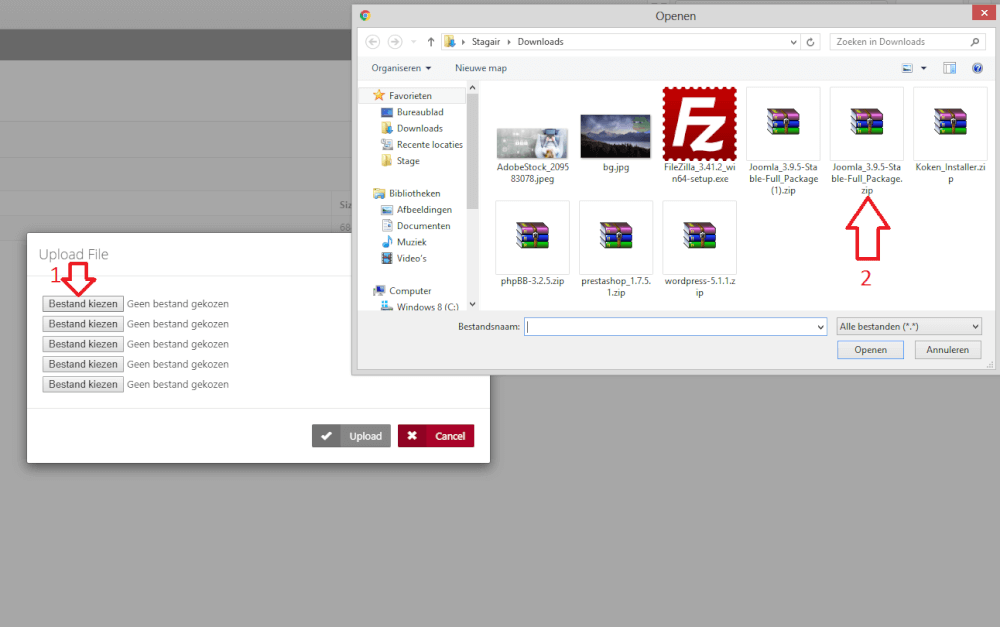
Step 4
Upload the zip file.
Step 5
Unzip the zip file.
Then you can apply read and write permissions to the wwwroot folder; this is necessary to be able to write the configuration file .
Step 6
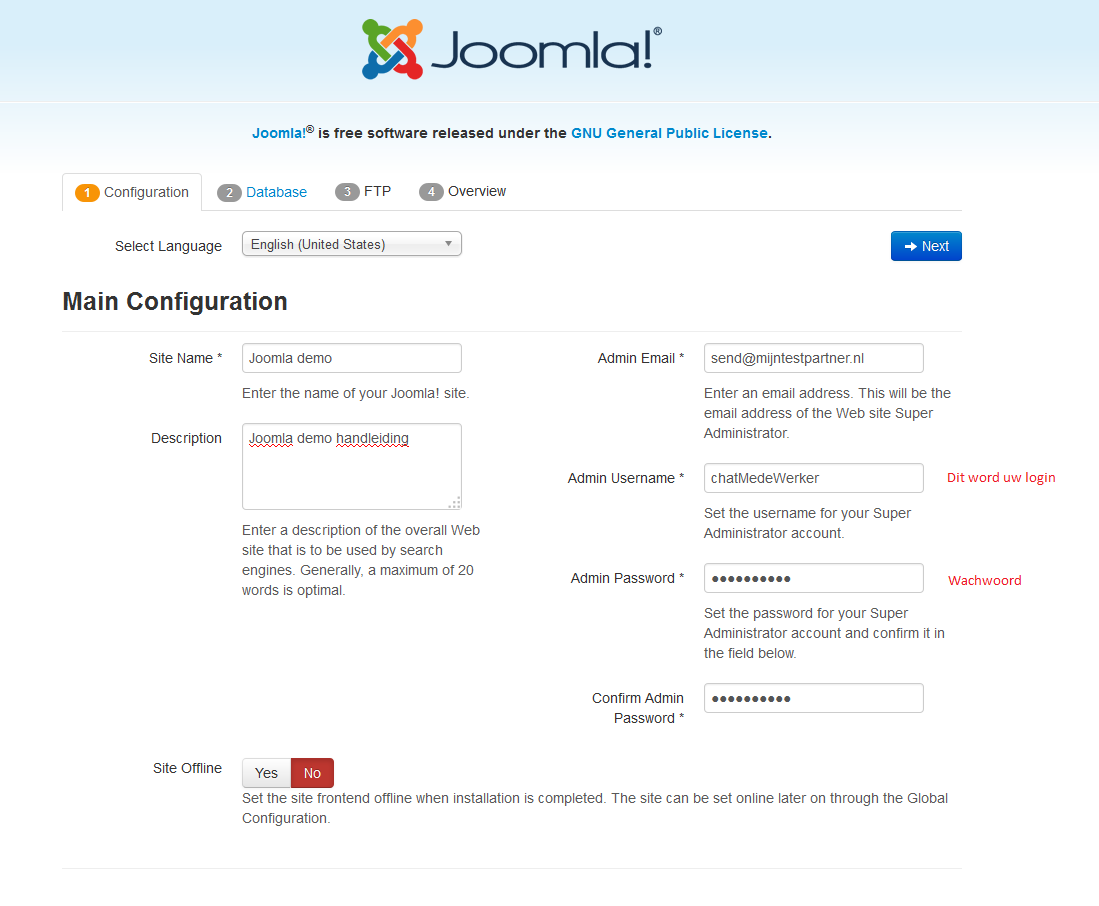
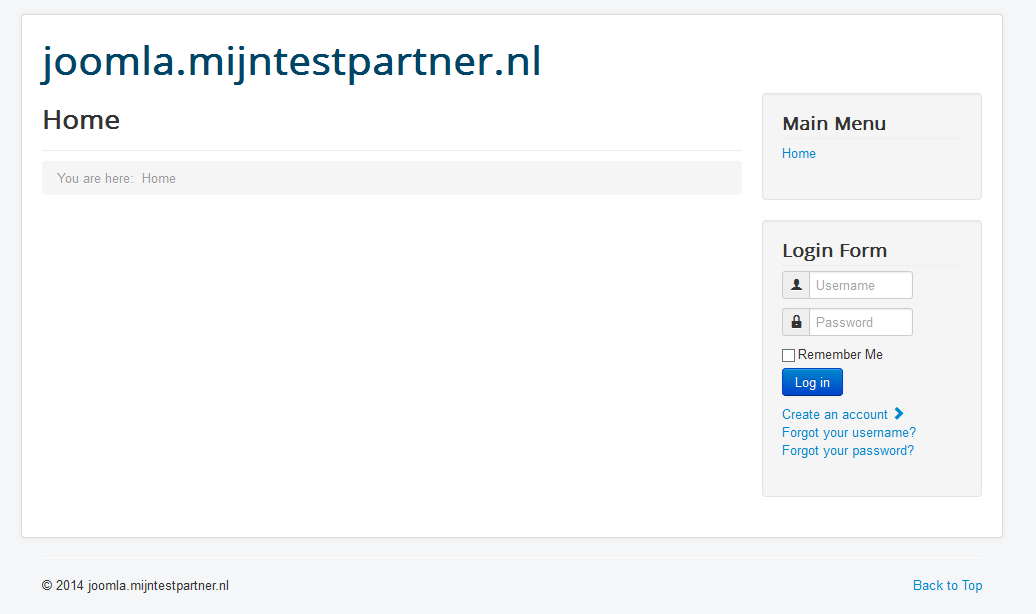
Go to your browser and open a new tab. Then enter your website URL, in this case joomla.mijntestpartner.nl. (Subdomain)
Then you will see the start screen of the installation, here you can make the settings for your login and such.
Step 7
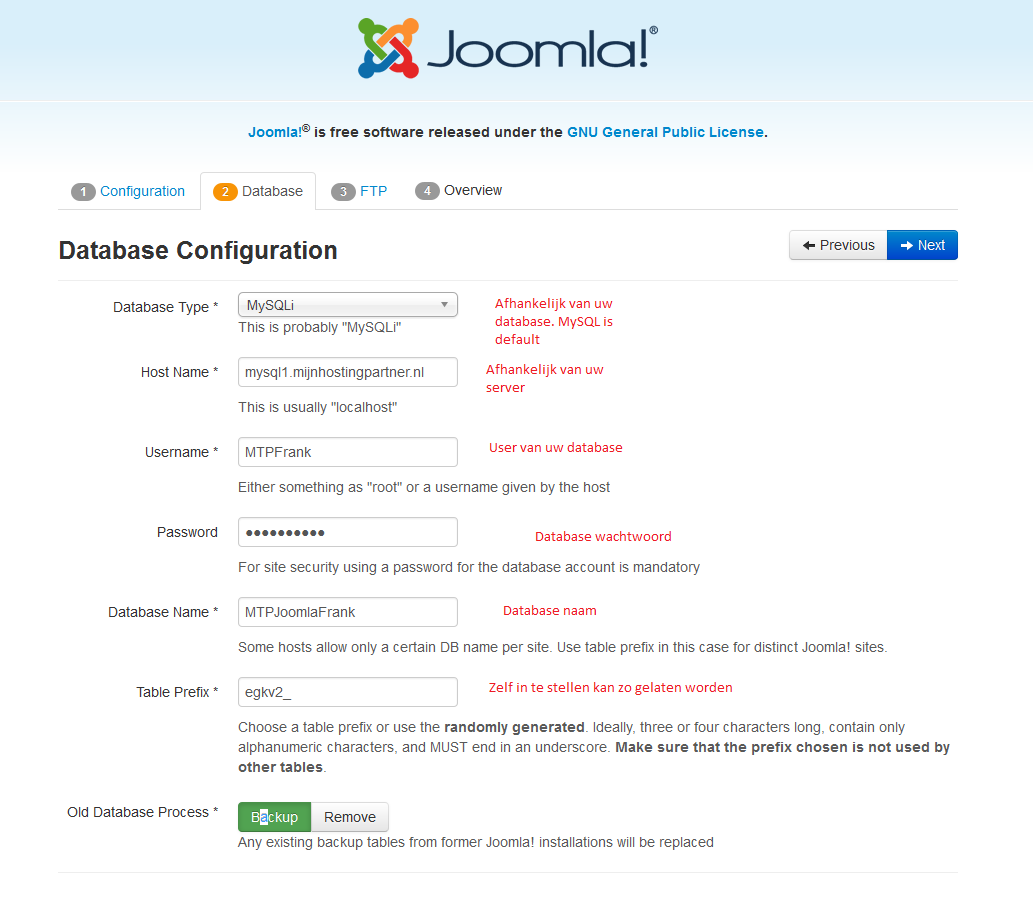
After this it is a matter of supplying your database data to Joomla, you do it this way:
Step 8
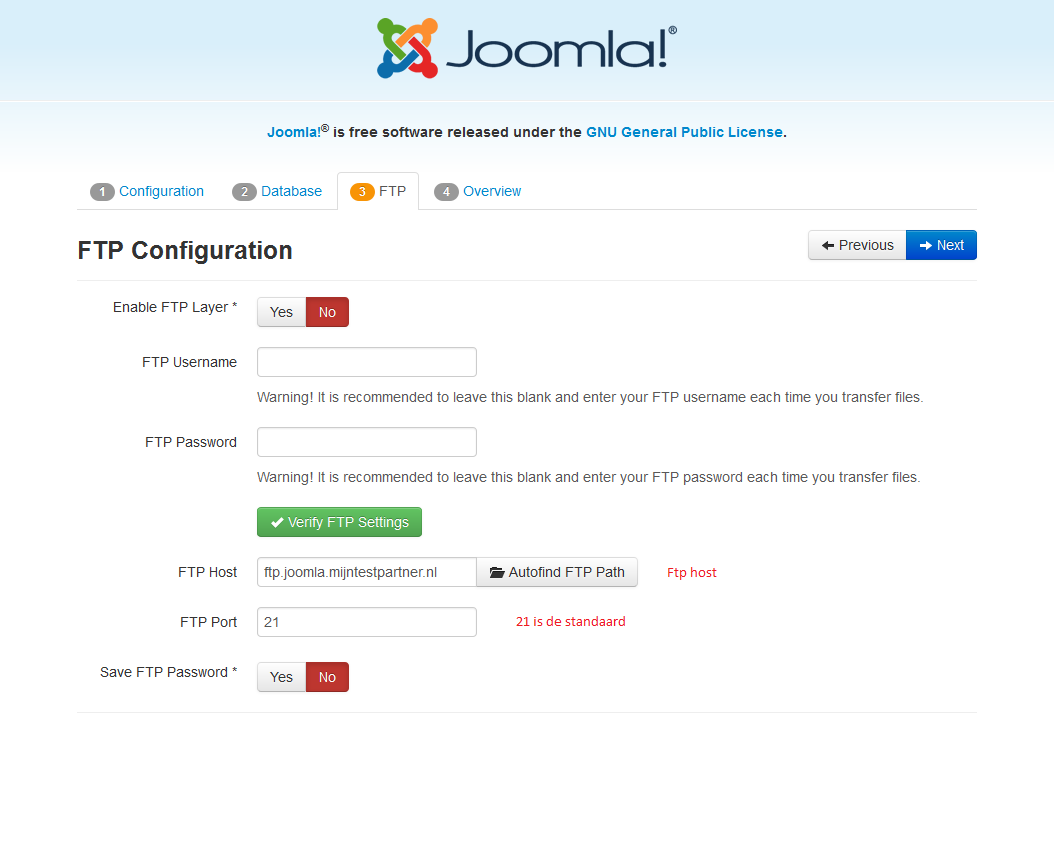
Once that is done you go to the next screen we come to the ftp data. You can enter this using the FTP account you created. This step can also be skipped.
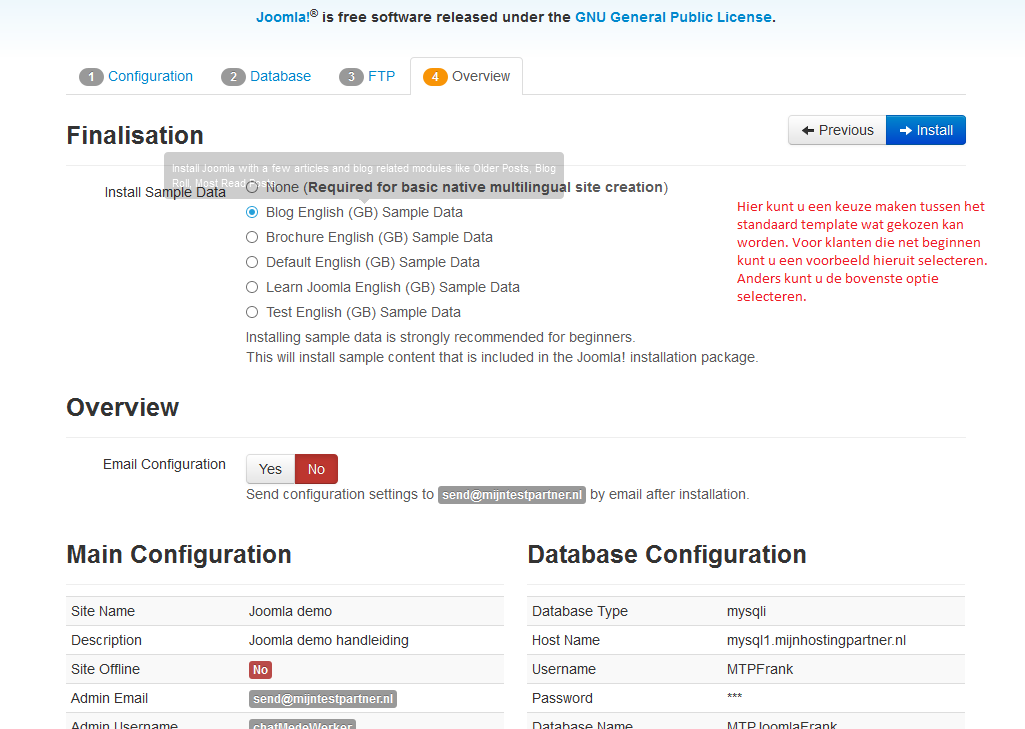
Step 9
We are now at the overview screen of the installation. What remains is to select the template you want to have installed. Then press install at the top of the screen.
Step 10
The installation is now complete, you can remove the installation folder by clicking on remove installation folder.
If you get an error you can delete the folder manually in the filemanager or in FTP. The folder is called: installation

Step 11
After this you can go to your site again through the browser and log in with your created data.
If you have any further questions you can join us online in the chat or you can create a ticket in the customer panel.
Keywords : Joomla joomla install installation I can