
Categories
Step 3 - Create hosting space for customer
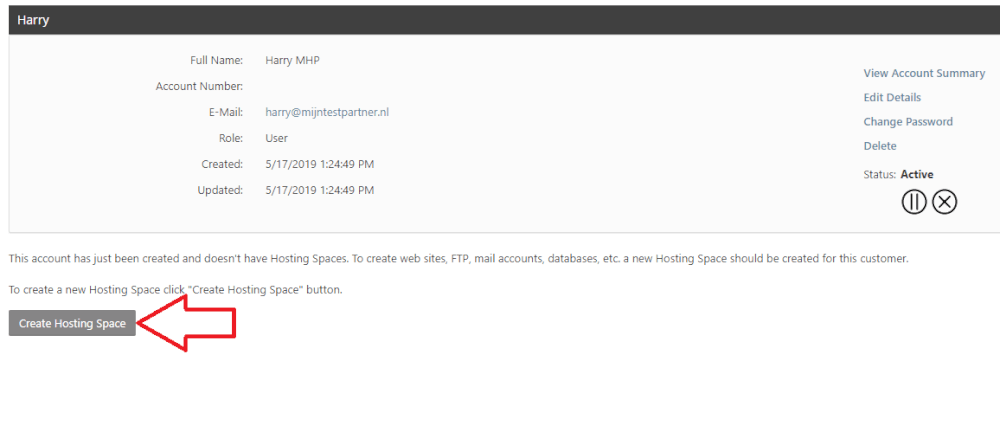
When you have created a hosting plan and client you can now set up the environment for the client. The hosting space depends on your further settings.After creating the client you go to the home page of the client by clicking on the client name.
Then you press the option Create Hosting space.
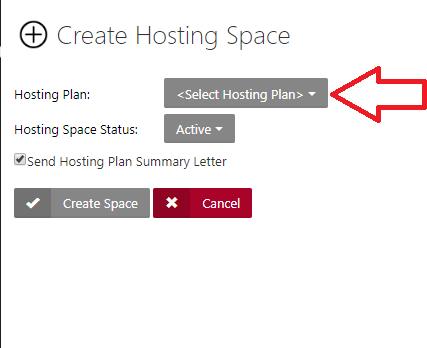
In the next screen you can choose the hosting plan, since we have created only 1 hosting plan we will select it now. You will get the options below. The hosting space status can also be selected, this is only logical if it is set to active immediately after creation.
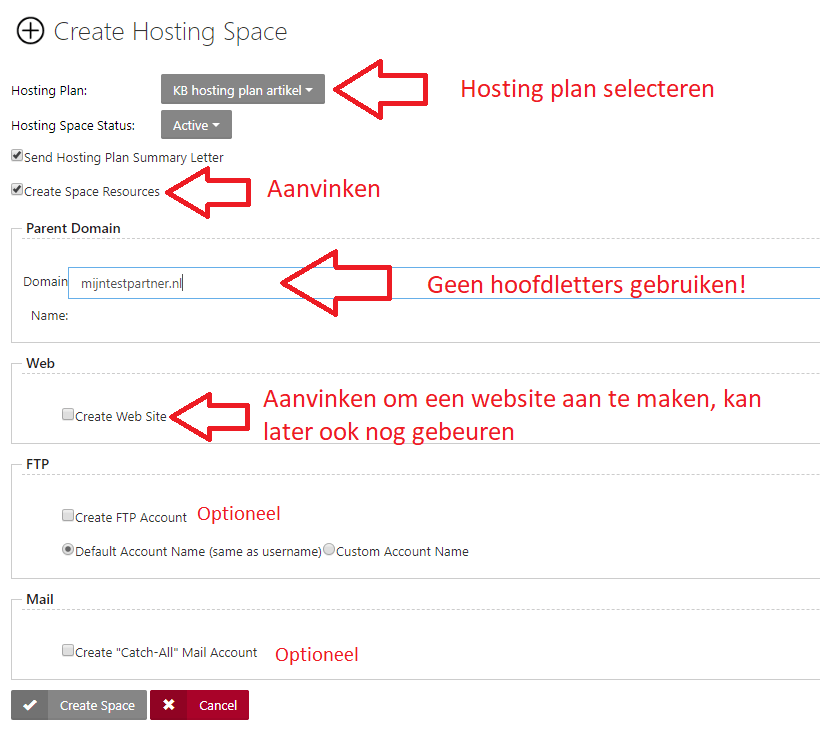
In this selection screen you must be careful to enter the domain name correctly. Once you get the confirmation that a new domain name is registered then you can add this domain right away. Further action is not necessary.
- Domain name should never be capitalized.
- Create website check the box if you want to create a website for this domain
- Create FTP account and catch all mail account are optional.
Then click on create space.
The hosting space is now created.
Finally you can change the name of the package. This can be done by pressing edit details and change it. Change this to the domain name.
If you have any questions you can create a ticket to the helpdesk or see if the online chat is available. Our staff will help you further.