
Categories
Setting up e-mail - Outlook 2010
Email setup - Outlook via control panel
MijnHostingPartner.nl strongly recommends to update to a later Outlook version, this for more options and security. Outlook 2010 is no longer supported by Microsoft and therefore also not by MijnHostingPartner.nl.
The manual below is to be used at your own risk and we do not provide support for it anymore.
To configure your mail in Outlook 2010 follow the next steps:
1) You open Outlook 2010
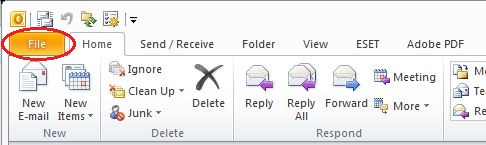
2 ) You click on the tab'File' in the upper left corner of your screen.
3 ) Then click on'AddAccount'.

4 ) Then click on'Manually configure server setting or additional server types' and then on'Next'.
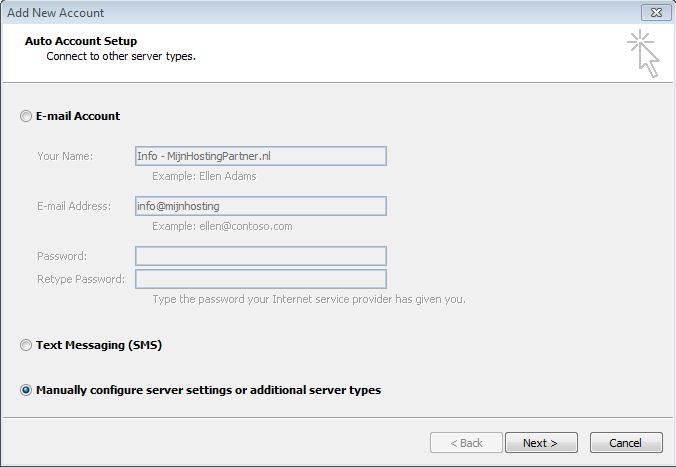
5 ) In the next screen you can leave everything as it is. Click on'Next'.

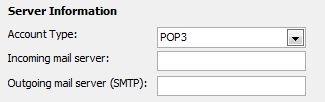
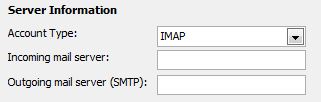
6 ) In this screen you have the choice to configure your mail as POP3 Account or as IMAP.
- POP3 -> You pull all mail from the server to your mail program. You decide what you do with the mail. The mail does not remain on the server. Continue with point 7.1 to 7.6
- IMAP -> You synchronise your mail. Mail and folders on the server match your mail program. Mail remains on the server and you can access all your correspondence via the webmail. Continue with point 8.1 to 8.6
7.1) If you choose POP3 then you fill in the following settings:
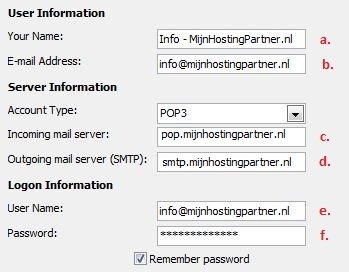
a. Your name - this is visible to others when you send an email.
b. Here you fill in your full email address.
c. Here you fill in ALWAYS'pop.mijnhostingpartner.nl'. So not the POP server of your internet provider!
d. Here you ALWAYS fill in smtp.mijnhostingpartner.nl ! So not the smtp server of your internet provider!
e. In this field you enter the complete mail address that you are configuring.
f. In the password field you enter the password that belongs to the mail address. You have entered this yourself via the control panel.
7.2) Then click on'More Settings' in the lower right hand corner.
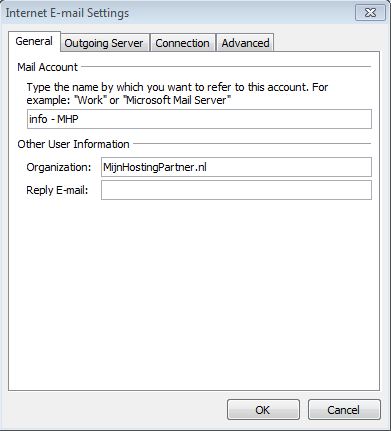
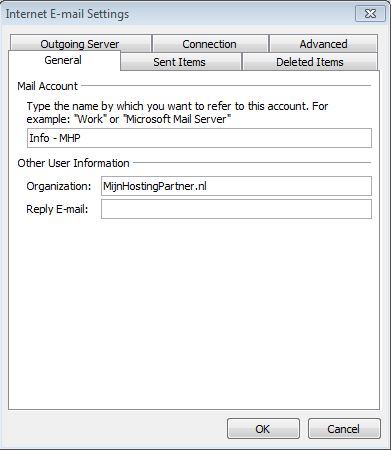
7.3) In the next screen you have a number of tabs. On the first general tab you can enter some other information. This is not required and you can leave it empty. You click on the second tab'OutgoingServer'.
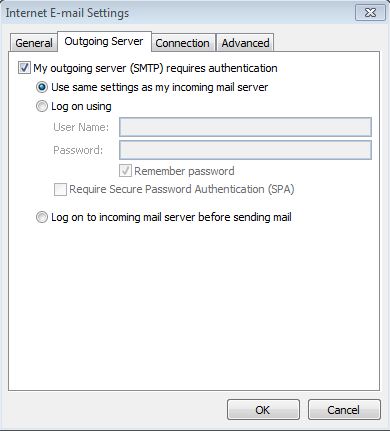
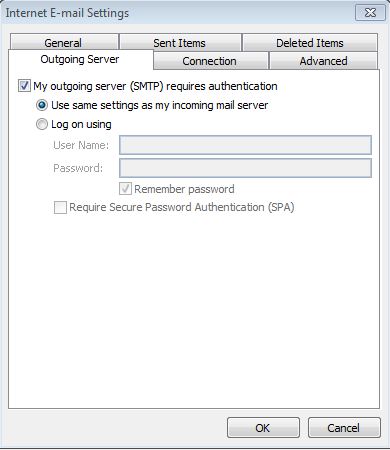
7.4 ) In this tab you tick'My outgoing server (SMTP) requires authentication
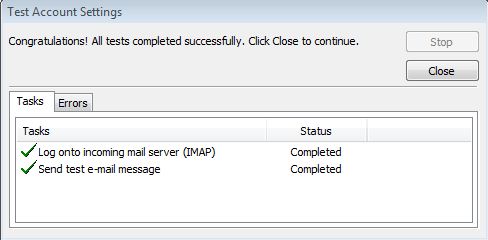
7.5) You are now almost ready with the configuration of your mail. You click'OK' after which you return to the overview screen. If you then click'Next' your account settings will be checked. If all check marks are green you have successfully installed your mail!
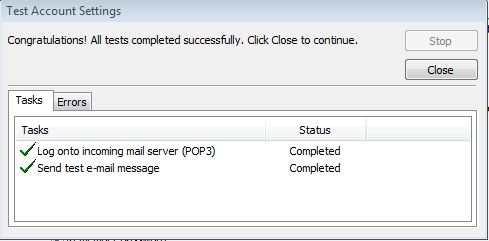
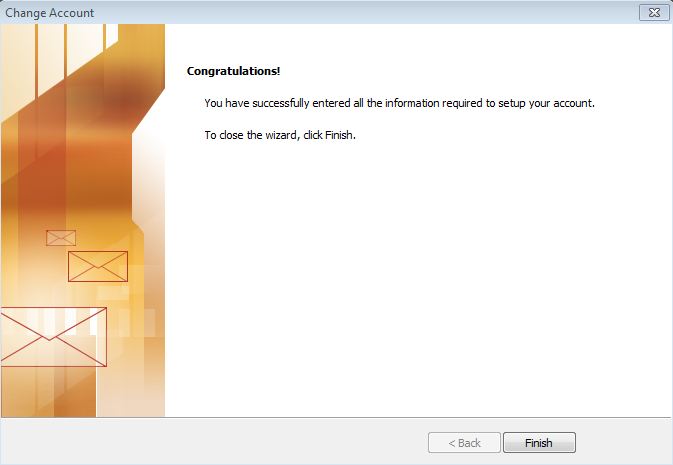
7.6) Now click'Close' and'Next' and 'Congratulations, you have successfully installed your mail! Finally click'Finish' and you are all set to use your mail account.
8.1) If you choose IMAP then fill in the following settings:
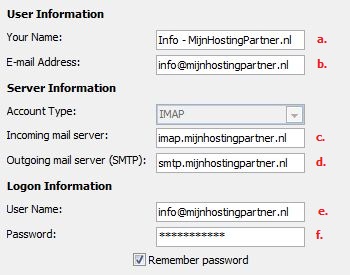
a. Your name - this is visible to others when you send mail.
b. Here you fill in your full mail address.
c. Here you enter'imap.myhostingpartner.nl'.
d. Here you ALWAYS enter smtp.mijnhostingpartner.nl ! So not the smtp server of your internet provider!
e. In this field you enter the full mail address that you are configuring.
f. In the password field you enter the password that belongs to the mail address. You have entered this yourself via the control panel.
8.2) Then click on'More Settings' in the lower right corner.

8.3) In the next screen you have a number of tabs. In the general tab you can enter some other information if you wish. This is not required and you can just leave it blank. You click on the tab'Outgoing Server'.
8.4) In this tab you tick'My outgoing server (SMTP) requires authentication
8.5 ) You are now almost done with setting up your mail. You click'OK' after which you return to the overview screen. If you then click'Next' your account settings will be checked. If all checkmarks are green you have successfully installed your mail!
8.6) Now click'Close' and'Next' and 'Congratulations, you have successfully installed your mail! Finally click on'Finish' and you are all set to start using your mail account.
NB. If there is an error in this article we would appreciate it if you would report it. We will then correct it. We thank you in advance for the effort and input!
Troubleshooting:
If you have problems with the incoming mail then you can try to log in to webmail.mijnhostingpartner.nl and test your password and details. See the previous steps for the server details and your account.
For outgoing mail problems:
If you have followed the previous steps and you cannot connect to the smtp host then we recommended that you try logging into webmail.myhostingpartner.co.uk again. If you are able to log in successfully then you can change the outgoing port to port 26
. Some Internet Service Providers block port 25.