Email DNS check and restore
In this article we explain how you can check the DNS records of a mail domain and restore them if necessary. Since the new Customer Panel, which came out in January 2021, this has become much faster and easier. It is no longer necessary to do this via the Control Panel.
The video below can be viewed, and the full article can also be read above to supplement this.
The most common email problems we encounter have to do with the DNS records. In this article we would like to explain how and where you can check this. So if your mail does not arrive or it is marked as SPAM by the recipient then it is important to first read this article.
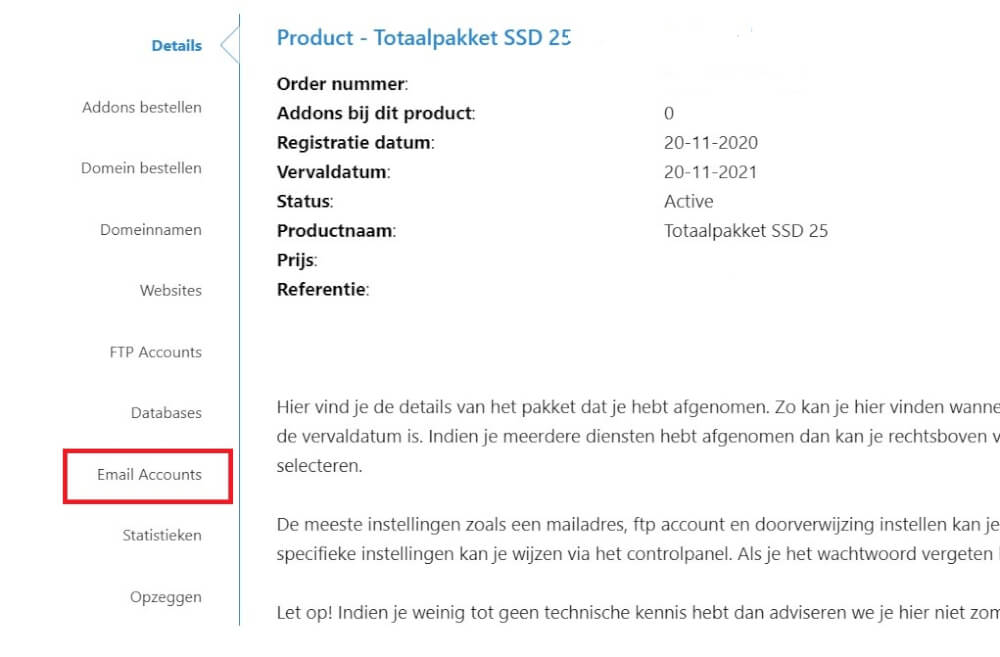
There are a number of DNS records which can be checked. To do this you first have to log into the customer panel. Then go to 'My Products' and navigate through the settings to the correct package until you get to the screen below:
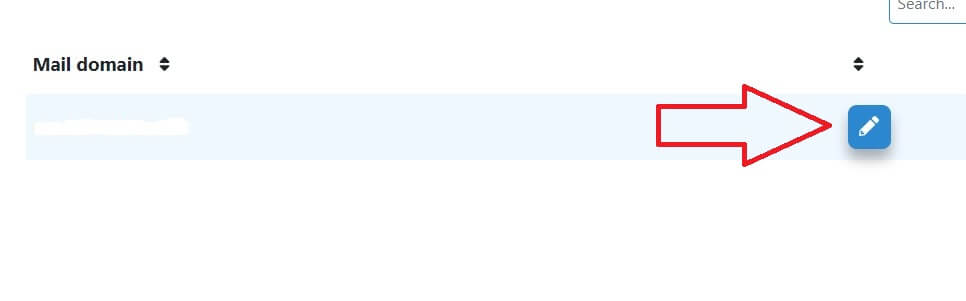
Here you open the Email accounts tab, and select the mail domain again.
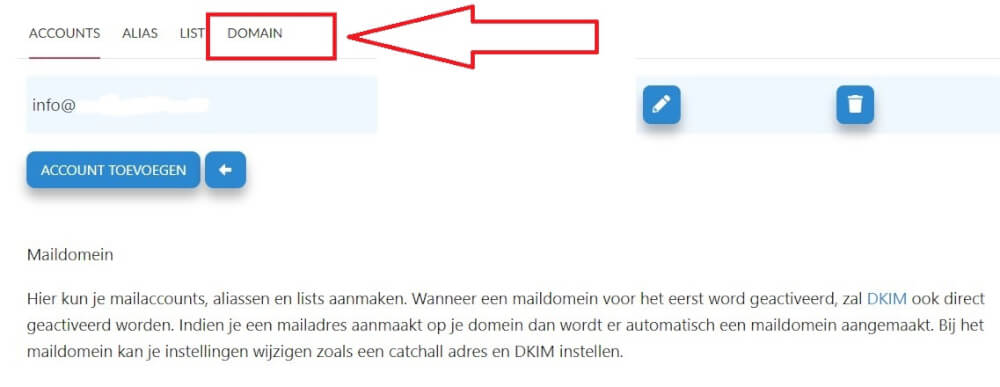
And finally the email domain tab to see these records.
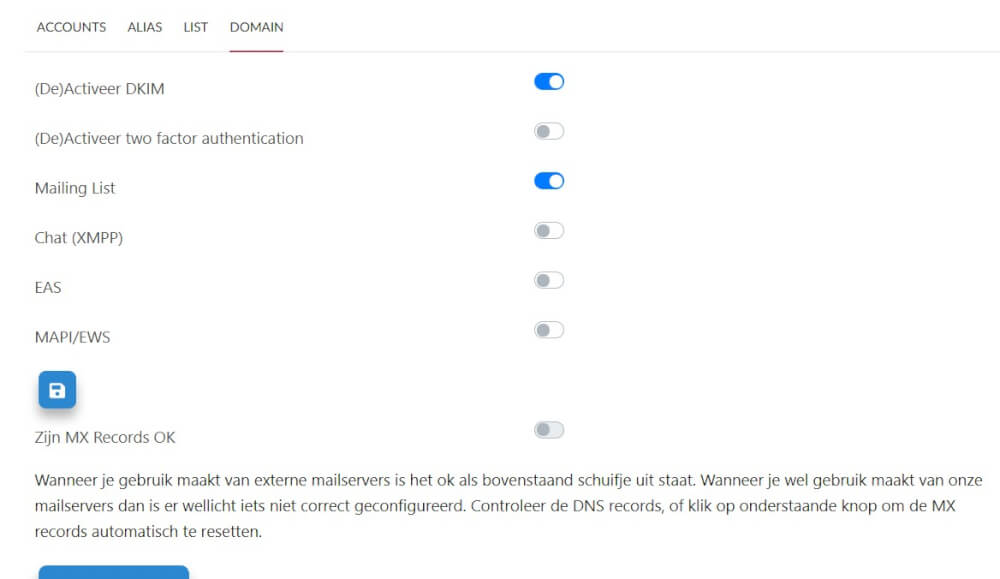
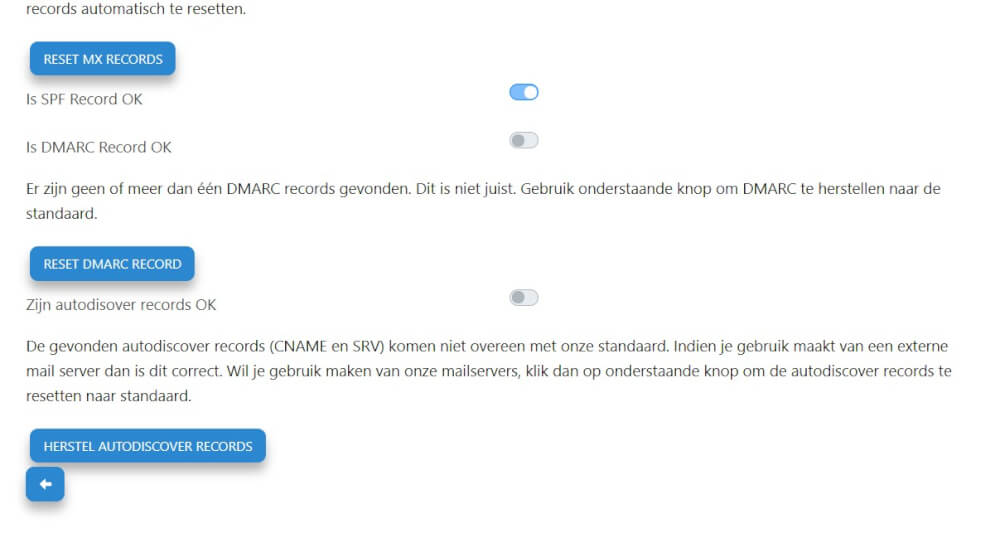
In this domain we have the DNS records for the email "broken", there is currently not possible to mail, and here are all problems. Like not receiving email and ending up in the SPAM of others. In the new Customer Panel we have made this so that there is always a check running. As soon as this is not in order then it is possible to restore this with a push of a button. Let's cover how this works. In the options section we have put a short explanation that makes it clear what you need to do here.
Wherever the slider is shown in blue it means that the record is intact and correct. If the slider or a record is incomplete, edited or otherwise incorrect, then the slider is gray, and there will immediately be a message under it that something is not as it should be. These can then be restored.
That recovery is via the various reset and recovery buttons shown above. These can simply be clicked and the rest is handled by the system. So let's do this to restore it to default.
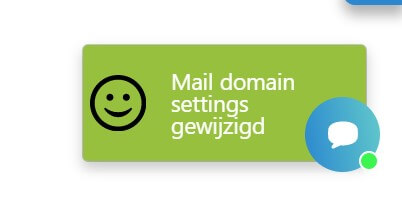
To do this you go through the suggestions of the customer panel, and press restore or reset where necessary. You will briefly see the following screen in the lower right corner after each time you press a restore button here:
If you see an unhappy face and a red message, then the reset was unsuccessful. Please contact us via the ticket system.
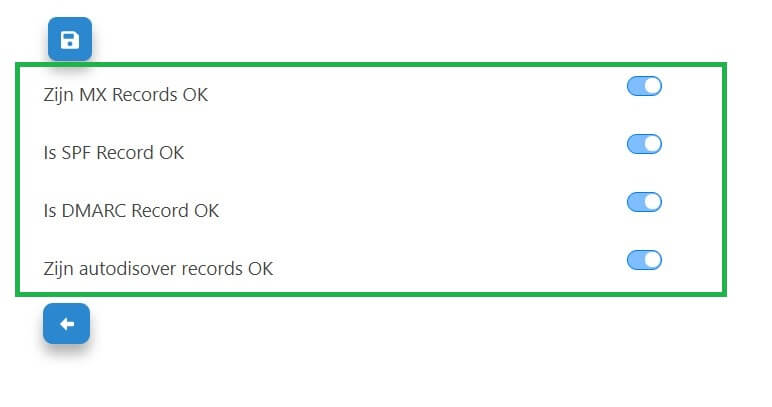
After you have gone through all these messages and repaired them with the green message, you will see it as follows;
All important DNS settings are now set correctly. If you still want to check this manually you can do so via Domains -> select the domain you just edited and go to the DNS records.
Here you see all the default records restored.
After you have made these changes, they are not processed immediately. This is because there is still a short period of DNS refresh. Want to know what that is? Then read on in the following article: