
Categories
DNS redirection to Microsoft Office 365
*NOOT* Please note that the "@" character is not supported in our DNS records. You can add the record without the character and after that it will just work.
The following steps are required to modify your DNS to Office 365.
Step 1: Within Office add your domain.
- Within Office, you can add a domain as an administrator.
- After that, authentication is required on the domain. The screen will show an MS code that needs to be replaced with your own MS code.
You will still be asked to create a TXT record in the domain.
Step 2: Convert DNS in the control panel.
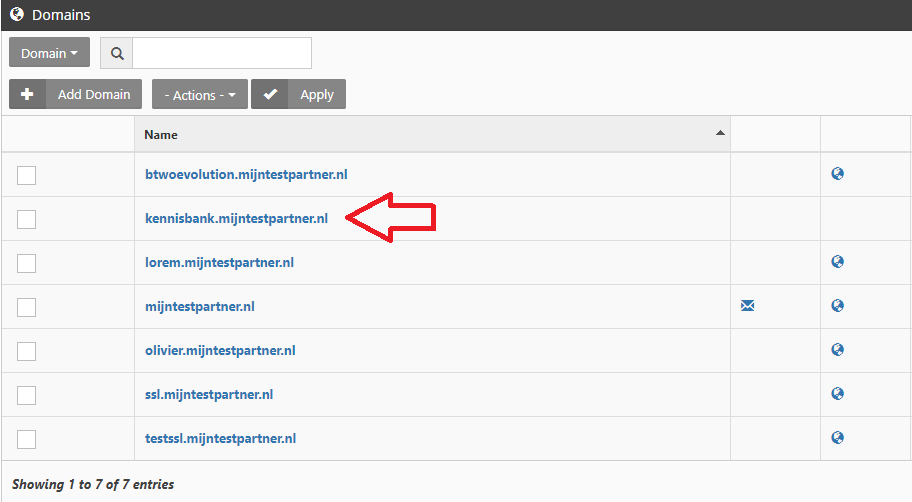
- Log into the control panel.
- Select the appropriate domain from the list under domains:
- Then click on Edit DNS zone records on the right:
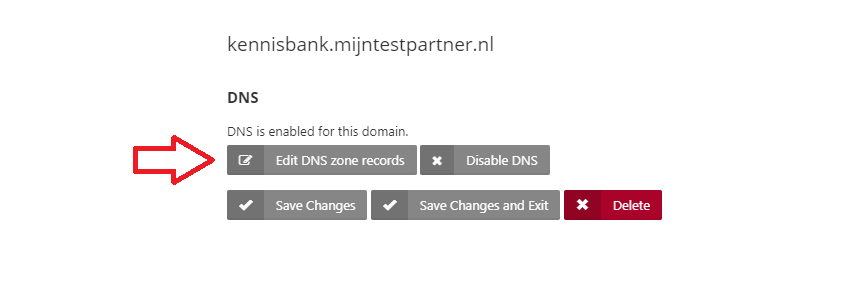
- Select the TXT record and add your MS code.
- After that you can press Save Changes.


Step 3: Check office
- Go to office and press the button to verify the domain.
- Follow the steps of the wizard until you get to the DNS, there you select: custom DNS management
- Here you will be asked for the DNS records of your domain.
Step 4: Modify DNS records.
- Again go to your DNS zone records in the control panel.
- Make a screenshot of the default DNS records, in case you want to change/restore them again.
Modify the following records:
- MX records, indicated in Office 365.
- TXT record, can be added by pasting the content between the "".
- 4 CNAME records
- 2 SRV records
Step 5: Check Office 365
The process can be completed and if everything went well a success message will be generated. After this this is finished. Keep in mind that this can always take a while because of the DNS refresh.
Additional
For more information and manuals about this topic you can also visit the Microsoft site: https://support.office.com/en-za/article/Create-DNS-records-at-any-DNS-hosting-provider-for-Office-365-7b7b075d-79f9-4e37-8a9e-fb60c1d95166
This is explained in more detail here.