Also check out below articles
 12-09-2025
What is IMAP?
Email is still the number one means of communication both for business and05-06-2026Set up an out-of-office message (vacation notification)
That time of year is fast approaching again: vacation season! For many startups27-05-2026Is a "Coming Soon" page a good idea?
A common phenomenon in the world of websites and the internet is the “Coming20-06-2020Optimizing images for the web
To make a website look good you need images. This can not only make a point clearer, but also look more visually pleasing and result for a longer time on a page if used properly. In this blog post we will show you how to best use images for the web.
There are a lot of advantages of using images on your website. And no doubt you will already be using them on your website. Whether this is a home-built website with a Bootstrap template, a WordPress website or an Umbraco site. It doesn't matter if you host a webshop, a portfolio for your work or a blog with us. Images create more sales, longer reading times and better conversions. And it looks better than a piece of text.
To get the best images for the web there are some optimizations to be done. We cover this with the following points.
- Resolution of the image
- Compression method of the image
- Alt tag and links for images
- What kind of images?
- Where to use them?
- File type of images
- Lazy loading of images
Image resolution
The resolution of the image has a lot of impact on the size of the image. Normal images for the web vary a lot and it depends on what theme or layout you use for your website. If you are using WordPress then your theme's documentation will also almost always show a recommended size and resolution for different images.
There is no rush in any website to display an image in full resolution at which the photo or graphic was taken. With most smartphone cameras, you're soon at 1920 by 1080 and often full 4K resolutions. This can quickly result in images of 5 MB or larger.
As a mobile user on a 3G network, loading a web page with a few of these images can take up to a full minute. And no user is going to wait for that.
If you want to adjust the resolution of an image, you can do so in various ways. You can choose to use a paid tool such as photoshop from Adobe. However, this is not cost effective for most use cases.
A barber store that manages a website is not waiting for the annual costs to be added. Therefore we also recommend using tools such as GIMP or Paint 3d. Certainly Paint 3d is very easy to use where GIMP and Photoshop might be more challenging for the beginner.
Examples of scaling an image in Paint 3d can be found below.

Compression method of the image
In addition to scaling the resolution, it is also advisable in most cases to put the image through a compression tool. By far our favorite web tool for this is TinyPNG, which we also use on a daily basis. After scaling the image, it can be run through the tool to compress it further.This ensures that in some cases the image is reduced in file size by up to 80 percent!

This is of course hugely important for not only mobile users but also for the faster loading of your website in other circumstances.
Alt tag and image links
Alt tags and the name of the image can also play a role in not only the ease of use but also the findability of an image on the web in search engines. If you use a random name like 1234.jpg how are search engines supposed to know what the image is used for? Also, images are not or less findable in your media library on the hosting. Just try to look up the same image again in a few months time.
Alt tags can signal to search engine crawlers what the image is used for. For example, instead of screenshot-1.jpg, it could be wordpress-mail-manual-1.jpg. This already gives a first signal of what the images are used for on your specific page for setting up Mail in WordPress.
Furthermore, links can be added to the images, for example, when users click on your image they will be redirected to the specific page where they can make a purchase. Or give their email address for the mailing list. Users are often more inclined to click on an image than a normal link.
What kind of images?
There is of course always a stock photo to use from free image websites as we also covered in previous blog post. However you should not forget that anyone can use them. The other day while browsing the Metro news website I also saw an image that I have seen on many other similar blogs. At some point you also lose the thing that makes your blog or website unique.
So try to use a self-made image, everyone has a smartphone nowadays that can be used to create extremely good images. Take a picture of the item you are writing about. Scale the resolution and apply the other things from this article. If done right, this will look a lot more reliable than the same generic image that every other party uses.
You can even create images or figures with tools such as GIMP or Paint 3d, a nice call to action in an image can bring more conversions than a simple "Click Here!" link.
Images are also simple to create with the screenshot tool within Windows, Mac or Linux. Open the program or topic you are writing about and create an image that way. A tactic we have used in this blog post and in many knowledge base articles.
Where to use?
An image can be used in a lot of places within a website. Whether you want to make a nice header image or make a point clear in an article. Often you need to break up text into shorter pieces than you might think. A large paragraph can scare off many users who are only looking for a small piece of information.
Besides images, the spacing, headings and other breaks between pieces of text are also important. An image can provide a clear break between subjects and thus show users a direct example.
So a product page of a new lamp that you are trying to sell should also have images of that lamp, in addition to the specific information about its features. Et cetera.
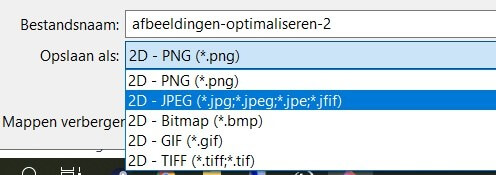
File type of images
For figures and graphics, the general rule is to display them in the PNG file type. For all other images and photos, jpg can be used. Opinions and facts vary among designers and writers who prefer one over the other. We will leave this further to the expertise of yourself or others. If you want to know more about this you can do further research on this yourself.
Also, other image types such as WebP and other more modern image file types are now emerging. These provide other benefits such as a smaller image without more quality loss. Whether these more modern types should be used immediately is the second question. Many browsers and mainly users do not support this yet. This resulted in a 404 report or broken images.
Lazy loading of images
Lazy loading of images means that you only load images when the user can see them on the screen. On a large or long page it can happen that images are not yet visible on screen, but are already being loaded. This can cause a longer loading time while this is unnecessary.
For most Content Management Systems you can install an extra plugin for this. WordPress is working in the background to implement this standard within their environment. This will be available in a future WordPress core version update.
Conclusion
Of course we are curious about your methods for setting up and arranging images on your website. What formulas or roadmaps do you work with? Or do you broadly use the same steps as we recommend in this blog post?
Please contact us if you miss anything or have better experiences. You can do this through the normal channels like chat or a ticket. Or just send an email to helpdesk@mijnpartnergroep.nl.